A wind up key is an essential part of a vintage doll costume. It can instantly transform one of your favorite dresses into a charming doll outfit. Not only does this accessory require basic supplies, but it can also be made only a few hours before an event or party for a quick-and-easy, last-minute costume.

Video of the Day
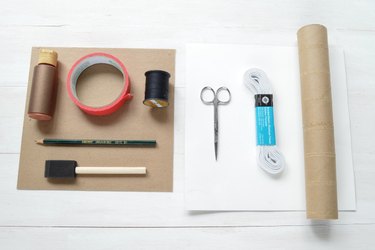
Things You'll Need
9x9" scrap cardboard
Metallic acrylic paint
Masking tape
Spool of thread
Pencil
Foam brush
Scrap paper
Sharp scissors
1/2 " wide sewing elastic
Paper towel or toilet paper tube
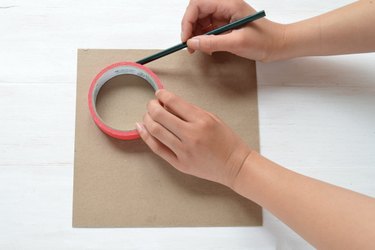
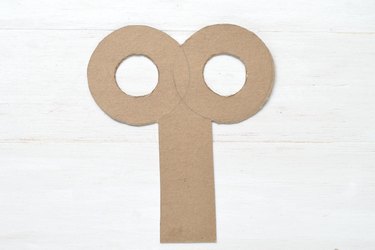
Draw Half of the Bow
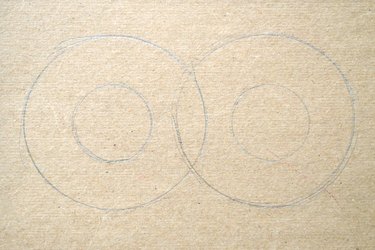
Create the outer shape of the bow of the key using a roll of masking tape and a pencil. Draw the first circle on the left side of the cardboard. To ensure an even shape, trace the roll of masking tape with a pencil.
Sketch the Other Half
Move the masking tape to the right of the first circle and trace a second circle. The second circle should overlap the first circle by about 1/2 inch.
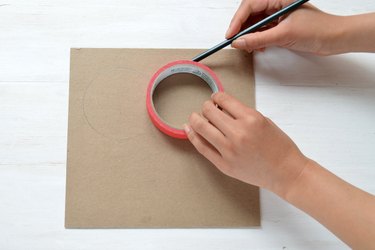
The overlapped circles should look like a Venn diagram.

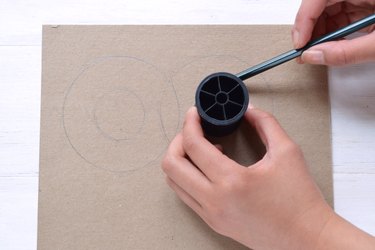
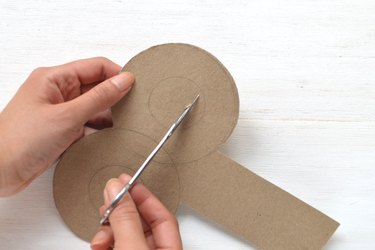
Trace the Circle
Create the inner shape of the bow by tracing a spool of thread in the center of the one of the larger circles you created with the masking tape.

Trace the Second Circle
Repeat in the second circle, making sure the small circles line up. Erase and re-trace if necessary.
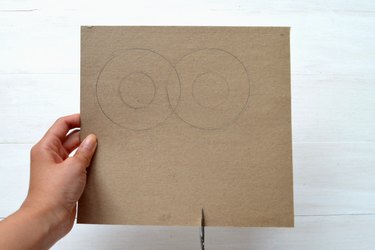
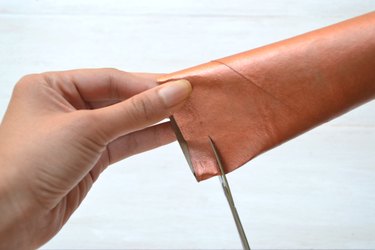
Create the Key Stem
Cut two vertical slits directly underneath the two circles. This step creates "stem" that will be inserted into the tube.
Tip
In order to fit into the cardboard tube, the width of the "stem" should be about 1 5/8 inches wide.
To estimate where you should cut, hold the tube against the cardboard and use it as a guide. You can also use a ruler and measure the width accordingly.

Cut Out the Bow of the Key
Cut around the circles.
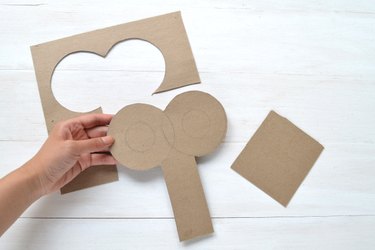
Remove the Circles
Carefully pierce one small circle. Cut along the outline to remove the circle.
Warning
Use caution when piercing cardboard with sharp scissors. Point the scissors away from you and do not place your hands close to the pointed ends.
Paint the Key
Paint the cardboard key. Let dry. Once dry, turn over and paint the other side. Let dry.
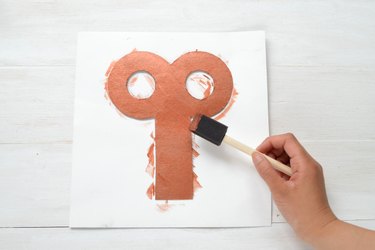
Tip
Protect your work surface with scrap paper.
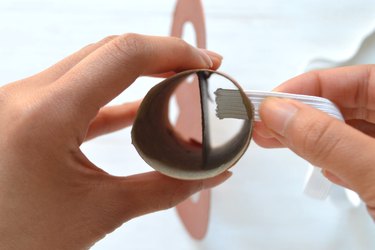
Paint the Tube
Apply an even layer of paint to the tube.
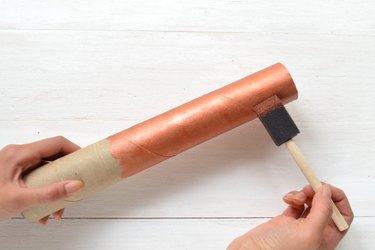
Tip
To prevent the cardboard tube from rolling around with wet paint, leave it to dry in a vertical position.
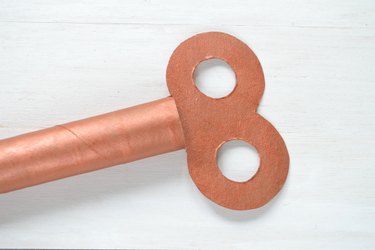
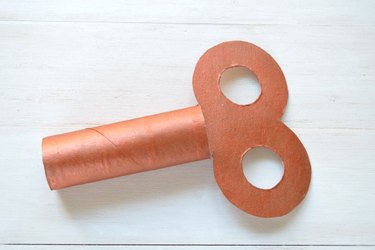
Push the Shape Into the Tube
Once dry, insert the flat cardboard shape into the tube.
Trim the Tube
If you are using a paper towel cardboard tube, cut away the bottom half.
If you are using a toilet paper cardboard tube, skip to Step 12.
Tip
Use tape to keep the flat cardboard from moving around in the tube.
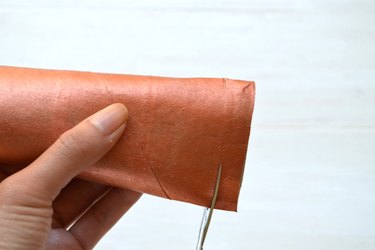
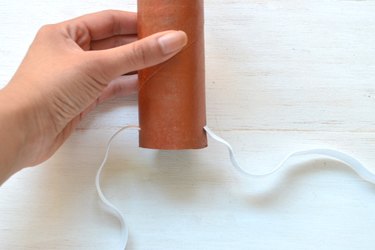
Cut for the Elastic
At the open end of the tube, cut a horizontal slit on each side so that you can thread through elastic to create a makeshift belt. Each slit should be the same width as the sewing elastic.
To easily cut the tube, gently fold it. The fold should not line up with the flat cardboard inside it. Instead, the fold should run perpendicular to it. Make sure the second slit lines up with the first slit.
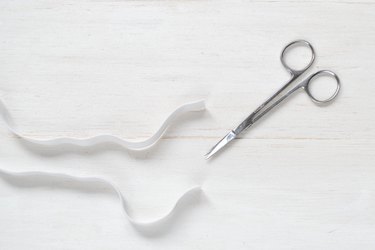
Measure and Cut the Elastic
Cut a strand of sewing elastic. It should be long enough to wrap around the upper portion of your waist. Wrap the sewing elastic around your waist to measure.
Insert the Elastic
Insert the sewing elastic through the the slits and pull the elastic until there is an even amount on each side.

Secure the Elastic Around Your Waist
Tie the elastic around your waist with a tight double knot. Trim if necessary.
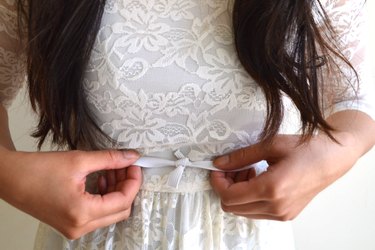
Make sure the elastic is tightly wrapped around your waist. This will keep the key in a horizontal position. Use safety pins to attach the elastic to your dress, if necessary.