There are a few rules pertaining to bricklaying, and one of them states you cannot lay a brick wall in the rain. If water comes into contact with mortar before the mortar has time to cure, your wall's structural integrity will be compromised. By protecting the wall with a concrete protective tent, you'll stop the rain from damaging the mortar. A concrete protective tent is a wedge tent and protects both the front and back of the brick wall.
Things You'll Need
Tape measure
Shovel
4 or more 2x4s
Hose
Bricks
Video of the Day
How to Lay Brick in the Rain
Step 1: Estimate Your Number of Tents
Determine how many concrete protective tents you need. Various manufacturers make concrete protective tents, and the measurements for each tent are different. Calculate how much space you'll need to lay the brick wall and use the appropriate size and number of tents.
Video of the Day
Step 2: Install the Tents
Set up the tents according to the manufacturer's instructions. Because each tent is manufactured differently, the installation process will vary. When fully installed, the tent should extend past the location in which you plan to lay the brick wall. The roof of the tent should slope down and protect the future brick wall from all rain.
Step 3: Check Tents for Effectiveness
Assess the area during a rainstorm to ensure that no rain will penetrate the tent. The ends of the tent will allow some water to sneak through, but that water should have no effect on your wall. Your main concern is the front and back of the tent, where the wedged design should adequately prevent water from splashing against the brick and mortar.
Step 4: Build a Wood Foundation Form
Build a form with 2-by-4 pieces of lumber. All brick walls require a structurally sound foundation. The form must be set into the ground, at a depth that depends on the size of your wall. As a general rule of thumb, you should dig about 1 1/2 feet into the ground for a wall that will stand 3 feet tall.
Step 5: Pour the Base
Fill the form with either mortar or concrete. Allow the mixture to cure according to the manufacturer's directions. Use a trowel to keep the mortar or concrete level as you pour it in place.
Step 6: Mix Mortar for Bricks
Mix the mortar for the brick wall. Although each manufacturer has different mixing requirements, you'll need water and a wheelbarrow at the very least. Use a wooden mixing stick.
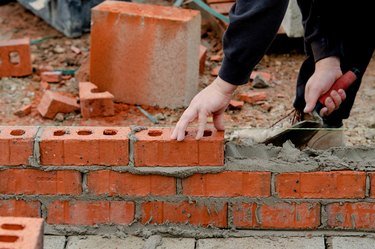
Step 7: Apply the Mortar
Scoop a good amount of mortar onto your trowel and spread it along the foundation until you reach the end. Lay the first brick and tap it in place with your trowel. Slap a small amount of mortar onto either end of the next brick and place it against the first brick. Wipe off the excess mortar with your trowel. Use a level to ensure the bricks are level as you go. If a brick isn't level, gently tap it with your trowel.
Step 8: Remove Tents After the Rain
Remove the concrete protective tent after the rain stops. Speeding up the curing process requires exposing the mortar completely to air and sun.
Tip
Offset the bricks as you set them in the wall; you don’t want one giant mortar line through your wall.