Things You'll Need
Powdered oxygen bleach
Plastic bucket
Long-handled scrub brush
Garden hose
Spray nozzle
Paint scraper
Sandpaper, 50- to 80-grit
Penetrating epoxy sealer
Paint brush
Roller
Epoxy filler
Putty knife
Tack cloth
Utility knife
Caulking gun
Silicone caulk for exterior use, paintable
5-gallon bucket
Painter's metal grid
Oil-base exterior primer
Latex exterior paint
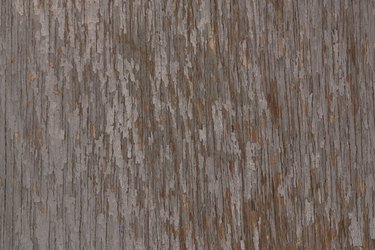
T1-11 siding is a plywood product used on the exterior of modestly priced homes since the 1970s. When properly installed and maintained, it is a durable exterior surface. In many cases, homeowners didn't realize that it required restaining every three to five years and repainting every 10 years. Even if the siding has suffered from weathering, it is salvageable as long as it hasn't delaminated.
Step 1
Mix a powdered oxygen bleach product with water in a plastic bucket according to the manufacturer's directions. Apply the solution to the T1-11 wood siding with a long-handled scrub brush. Scrub the siding from the bottom up, then rinse thoroughly with a garden hose and spray nozzle. Allow to dry for at least 24 hours.
Video of the Day
Step 2
Remove any peeling paint with a paint scraper. Sand around the edges of any remaining paint with a 50- to 80-grit sandpaper.
Step 3
Apply a penetrating epoxy sealer to the surface and exposed edges of the siding with a paintbrush or roller. Pay particular attention to the sides and edges of the siding, since water can wick into the wood and delaminate the layers of plywood. Allow to dry for two to five days.
Step 4
Repair any holes or deep cracks in the siding with an epoxy filler formulated for wood. Apply with a putty knife, smoothing the top of the patch. Sand lightly when dry to blend the patch with the surrounding wood. Wipe with a tack cloth to remove all dust before priming and painting.
Step 5
Caulk around the doors and windows before proceeding to paint. Remove any damaged caulk by cutting the edges with a utility knife and scraping clean with a putty knife. Apply an exterior-grade, flexible, paintable silicone caulk and allow to dry.
Step 6
Prime the T1-11 siding with a high-quality oil-based primer. Roll the primer onto the siding with a medium-nap roller. Paint the grooves in the siding with a paintbrush. Allow to dry according to the manufacturer's directions.
Step 7
Apply two coats of a high-quality latex paint to the T1-11 siding. Paint the grooves with a paintbrush first, then roll the paint over the entire surface of the siding. Allow to dry before applying the second coat of paint.
Tip
Remove and replace delaminated T1-11 siding. Repairing plywood when the layers have separated is rarely productive; the siding will continue to deteriorate. If the siding is cupped at the bottom, screw it securely to the underlying framework of the house. Fill screw holes with epoxy filler before priming and painting. Avoid using bleach, TSP or other caustic cleaners on weathered wood siding.
Warning
Wear gloves, safety glasses, a dust mask, long sleeves and pants when cleaning, sanding and painting T1-11 siding. Depending on the age of any paint, it may contain lead; avoid breathing the paint dust. Don't use pressure washers on wood siding; the high pressure can force water into the wood, further damaging the siding.
Video of the Day
- Forest Products Laboratory: Paint, Stain, Varnish, or Preservative? It's Your Choice
- Ask the Builder: Natural Wood Siding Needs TLC
- Smith & Co.: Smith's Original Formula MultiWoodPrime
- RotDoctor.com: Outdoor Rot in Homes
- University of Missouri Extension: Simple Home Repairs: Exterior Painting
- YouTube: Lowes -- Tips on Exterior Wood Siding Painting Preparation
- ProTek-USA: Solutions for T1-11 Siding Problems
- Servicemagic: T1-11 Siding
- Doan Renovations: T1-11 Siding Repair