
How to Build a Freestanding Door

Freestanding doors can be surprisingly useful, whether in theater production companies to signify entrances and exits, in office buildings to separate cubicles, or in children's rooms for playtime.
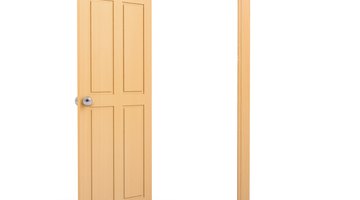
Freestanding doors require only plywood and 2-by-4s to create, and may be integrated into the surrounding environment for support, or rely on wooden stands at the base to keep the frame upright, even when the door is slammed. The door construction requires only basic materials and experience for a useful final product.
Things You Will Need
- 2 plywood sheets, 3/4-by-36-by-80-inch
- Drill
- Wood drill bits
- Wood screws, 1 1/4-inch
- 2 2-by-4 boards, 39 1/2-inch
- 2 2-by-4 boards, 80 1/2-inch
- Wood screws, 3-inch
- 2 2-by-4 boards, 24-inch
- Metal L-brackets, 5-inch
- 2 door hinges
- Doorknob
Tip
Paint the door to hide the screwheads. A plywood board or other flat, solid surface may be attached under the door frame for support if the two 2-by-4s are in the way of traffic.
-
Lay out two 3/4-by-36-by-80-inch plywood sheets on top of each other. Drill 1 1/4-inch wood screws in a 12-inch grid across the two boards, not getting closer than 3 inches to the edge.
-
Create a frame with two 39 1/2-inch 2-by-4s and two 80 1/2-inch 2-by-4s, so that all the boards are on their long, thin sides. Have an assistant hold the boards in place so that they make a 39 1/2-by-80 1/2-inch rectangular frame. Drill two holes through each 39 1/2-inch board and into the ends of the two longer boards. Attach the boards together using 3-inch wood screws.
-
Position a 5-inch metal L-bracket over each corner of the frame on the outside edges. Mark the positions of each bracket hole in the frame. Drill out each hole. Attach the brackets to the frame using 1 1/4-inch wood screws.
-
Stand the frame upright and have an assistant hold it in place. Position a 24-inch 2-by-4 on the bottom of the frame, perpendicular to the frame. Set the center of the large surface of the board against the frame, with its long, thin end on the floor, so that the both boards stick out a foot on either side of the door. Attach the boards to the frame with three 3-inch wood screws through each board.
-
Position the door within the frame and set two door hinges evenly between the door and the frame, about a foot from the top and bottom of the door. Mark the holes. Drill out the holes and attach the hinges to the frame and door with 1 1/4-inch wood screws.
-
Mark a spot for the doorknob and drill out a hole for it. Drill another hole through the edge of the door into the first doorknob hole. Slide the doorknob parts into the various holes. Close the door and mark the spot where the door latch hits the frame. Position the faceplate of the doorknob against the frame at this spot. Mark the attachment holes and the main hole of the faceplate. Drill out these holes and attach the faceplate with 1 1/4-inch wood screws.
The Drip Cap
- Freestanding doors can be surprisingly useful, whether in theater production companies to signify entrances and exits, in office buildings to separate cubicles, or in children's rooms for playtime.
- Freestanding doors require only plywood and 2-by-4s to create, and may be integrated into the surrounding environment for support, or rely on wooden stands at the base to keep the frame upright, even when the door is slammed.
- Mark the positions of each bracket hole in the frame.
- Attach the boards to the frame with three 3-inch wood screws through each board.
- Drill out the holes and attach the hinges to the frame and door with 1 1/4-inch wood screws.
- Drill another hole through the edge of the door into the first doorknob hole.
Writer Bio
Nat Fondell has been writing professionally since 2006. A former editor of the "North Park University Press," his work has appeared at scientific conferences and online, covering health, business and home repair. Fondell holds dual Bachelors of Arts degrees in journalism and history from North Park University and received pre-medical certification at Dominican University.
More Articles