
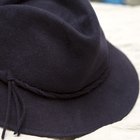
Instead of purchasing a new hat, dye a hat you already own a different color. Manufacturers sell dyes in a variety of different colors and you can also mix and match the colors to make different shades. Since hats are made from cotton, they can be dyed as easily as T-shirts. If you want to give your hat a tie-dye design, bunch it up and wrap thick rubber bands around it before placing it in the dye. White hats are easier to dye than colored hats, but it is possible to give a colored hat a new shade.
Pour 2 quarts of water into a pot. Put the pot on your stove burner over medium heat. While you wait for the water to simmer, soak the hat in warm water until it's completely saturated.
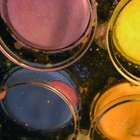
Pour a packet of dye powder into the simmering water. If you wish to dye the hat a lighter color, add less powder. Stir the powder until it dissolves.
Turn the burner heat down to low, but leave the pot on. Put the hat into the water. Use a wooden spoon to stir the hat around in the water. Leave the hat in the water for at least 10 minutes. Lift the hat out to check it and put it back in if you want a deeper shade. The hat can stay in the dye for up to one hour.
Remove the hat from the dye. Rinse the hat under warm running water until the water runs clear off the hat.
Put the hat in your dryer and spin it dry. The heat from the dryer will also help set the dye color.
Related Articles

How to Dye a New Era Fitted Cap
How to Darken Jeans

How Do I Use Rit Dye to Make Turquoise ...
How to Make a Fitted Hat Smaller

How to Dye a Cotton Hat
How to Dilute Too Bright Fabric Dye to ...

How to Bleach Khakis White

How to Change the Color of a T-Shirt

How to Dye Fabric Green

How to Dye a Swimsuit
Ideas for Decorating a Hat

How to Wash a Baseball Cap

How to Dye a T-Shirt Using Beets

How to Dye Synthetic Hair With Rit Dye
How to Dye Canvas Shoes but Not the ...
How to Remove Sweat Stains From a ...

How Can I Make a Straw Hat Smaller?

How to Dye Pantyhose

How to Dye a Cotton Blazer
How to Wash Nike Dri-FIT Hats
References
Photo Credits
Goodshoot/Goodshoot/Getty Images