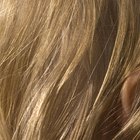
Thinning hair is a problem that both men and women face. With many advertisements in print, on television and online many do not know what treatments are best for them. This is especially concerning for people who are experiencing thinning hair as a result of using chemical relaxers. The harsh chemicals in relaxers damage the hair from the first application. With excessive use they can eventually lead to hair loss. Learn ways to combat thinning, relaxed hair and regain the thicker, fuller locks you once had.
Give Your Hair a Break
Since chemical relaxers break down the hair to straighten it, this process by default also damages the hair. If frequent application of chemical relaxers occurs, the process will damage the hair to the point where it becomes dry, brittle and begins to thin. This is the result of over processing the hair. When your hair begins to thin, it needs a rest from all chemical processes, especially relaxers.
Get a Hair Cut
Many try to avoid this but in the long run it is beneficial to growing healthy hair free from damage. When the hair is cut down to the new growth, after ceasing all chemical processing, the hair receives a fresh start at healthy growth. You no longer have the damaged relaxed hair that more than likely continues to break every time the hair is styled. Once your new growth or virgin hair is left, you can begin a recovery regimen for your hair and scalp. If cutting your hair down to the new growth is not an option you want to consider, then trim at least a half inch of hair to get rid of split ends.
Treating the Hair and Scalp
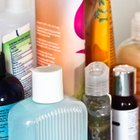
Your treatment needs to begin with the scalp. Your hair follicles are within the scalp and they may be damaged as well if you are experiencing thinning hair. Massage your hair daily for five minutes with a moisturizing oil like olive, coconut, jojoba or tea tree oil. The oil moisturizes the scalp while the massage stimulates blood flow to the hair follicle. This blood flow will promote healthy hair growth from the follicle. If you have cut the hair down to the virgin roots, many products are on the market that will help bring out your curl pattern. Miss Jessie's curly pudding is reported to help define your curls. This product should be used with a moisturizing hair dressing or hair butter like Carol's Daughter's Healthy Hair Butter to bring moisture, softness and shine back to the hair. This regimen also works well if you have decided to keep you relaxed ends.
Handle Your Hair With Care
You also will need to be gentle with your hair during this recovery period. When styling the hair, always use a wide tooth or detangling comb. Use a natural bristle brush instead of a plastic bristle brush, which tears at the hair more often. Natural bristle brushes distribute your scalp oil through the hair to help it retain moisture. Try to limit your use of hair products that contain waxes, paraffin and SD alcohol as these products dry the hair and cause buildup. Try not to put stress on the hair by pulling it into a tight ponytail, buns or wearing tight braids. Also limit your use of thermal stylers. If you want to flat iron your hair, forego blow drying it. If you hot comb, do not blow dry or flat iron the hair. There are plenty of smoothing products that help straighten the hair such as Avon's Advance Technique's Super Straight Smoothing Balm.
Keep Hair Clean
You don't want to dry out your hair with excessive washing, however, you do want to wash it to keep products from building up on your hair and scalp. Product buildup causes hair breakage because it weighs the hair down. This same buildup occurs on the scalp as well clogging the hair follicle preventing new growth from emerging through the hair follicle. You should wash your hair no more than every other day and no less than once week depending on the amount of hair products used and the moisture level of your hair.
Best Practices
Visit a dermatologist before trying any home remedies for addressing your thinning hair problem. Hair grows from the scalp and the scalp is skin, therefore a dermatologist should be seen to discuss the reasons behind your thinning hair. Your thinning hair could be the result of other factors that are in addition to or do not include your chemical relaxer. Certain medications can cause hair to thin. Stress also will lead to thinning hair. Make sure there is not a medical reason for your hair thinning. Whether your treatment is based on home remedies or prescribed medicines, the treatment takes time. Results can typically be seen within two months when you can see new growth emerging. Remember to always be gentle with your hair and scalp to prevent stress and damage to them.
Related Articles

Taming Over-Permed Hair

How to Care for Dry, Damaged & Weak ...
How to Control New Hair Growth

How to Prepare Hair Before Virgin ...

How to Get a Healthy Spiral Perm
How to Treat Hair Damaged From a Perm
How to Do Micro Braids Yourself for Free

How to Grow Fine Relaxed Hair
How to Fix Hair That is Damaged From ...
How to Keep Your Hair Clean

How to Permanently Make Extremely ...

How to Relax a Perm With Home Remedies
How to Straighten Hair Without Blow ...
Types of Hair Treatment

How to Relax Permed Hair
Hairstyles for Chemo Patients
How to Relax Damaged Hair
How to Condition Hair After Using a ...
How to Care for Hair After a Weave ...
How to Loosen a Tight Perm
References
Writer Bio
ShawnTe Pierce is a fashion designer and writer with more than 10 years of experience. Her work has appeared on Woman's Day and The Frisky, among other online publications. Pierce has a Bachelor of Science in apparel design from the University of Delaware.