
How to Raise an Outdoor Spigot

Outdoor spigots connect the garden hose to your home's water source so you can have access to water outside your house. But sometimes the height of the outdoor spigot is too low and inconvenient to reach. Raise the outdoor spigot to a more convenient location.
You can raise the spigot yourself with the right tools and directions, saving you hundreds of dollars from having to hire a professional.
Things You Will Need
- Wrench
- Hacksaw
- Sand paper
- Flux
- Solder
- Propane torch
- Copper pipe
- Copper fittings
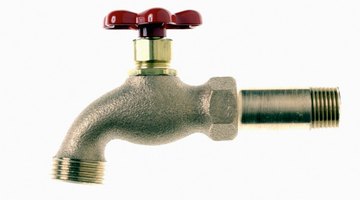
- Faucet
-
Turn off the main water supply at its valve. If you cannot locate this valve, go to the water meter and turn the water off there. Use a wrench to turn the valve at the water meter.
-
Cut off the spigot with the hacksaw. Water that is remaining in the water line will pour out. After the spigot is cut, you will just have the copper pipe.
-
Sand the tip of the copper pipe with the sand paper to clean it.
-
Determine the fitting required to raise the spigot. If the copper pipe comes directly from the wall, then you will need a 90-degree elbow to raise it. If your copper pipe comes from the floor, you will need a coupling. Clean the end of the copper fitting you will be using with the sand paper.
-
Apply a thin layer of flux to the end of the fitting and the copper pipe. Place the fitting on the copper pipe.
-
Turn on the propane torch and heat up the center of the fitting. Use your other hand to hold the solder, ready to be used. When the fitting is heated, place the tip of the solder on the gap where the fitting meets the pipe. If the fitting is heated up enough, the solder will be absorbed into the fitting, soldering it in place.
-
Cut the copper pipe to the height you want the spigot to be with the hacksaw. Clean the end of the copper pipe and solder it to the other end of the copper fitting.
-
Clean the other end of the newly soldered copper pipe with the sand paper. Place a small amount of flux at the end of the pipe and the new faucet. Place the faucet into the pipe and heat up the edge of the faucet with the propane torch and solder it in place. The faucet will take longer to heat up compared to the copper fittings so it can take longer to solder it properly.
-
Turn on the water supply and test for any leaks. Look for any leaks on the soldered parts of the newly raised spigot. If you noticed any leaks, turn off the water supply and let the spigot run. Re-solder the leaking points until the leak stops.
The Drip Cap
- Outdoor spigots connect the garden hose to your home's water source so you can have access to water outside your house.
- Water that is remaining in the water line will pour out.
- Sand the tip of the copper pipe with the sand paper to clean it.
- If the copper pipe comes directly from the wall, then you will need a 90-degree elbow to raise it.
- Apply a thin layer of flux to the end of the fitting and the copper pipe.
- If the fitting is heated up enough, the solder will be absorbed into the fitting, soldering it in place.
- Turn on the water supply and test for any leaks.
Writer Bio
Louis Gutierrez began writing in 2010 for various websites, specializing in real estate, construction and electronics. He has over 10 years experience running and operating various successful businesses in these fields and holds a Bachelor of Arts in business administration, graduating magna cum laude from Florida International University.
Photo Credits
- Thinkstock Images/Comstock/Getty Images
- Thinkstock Images/Comstock/Getty Images
More Articles