
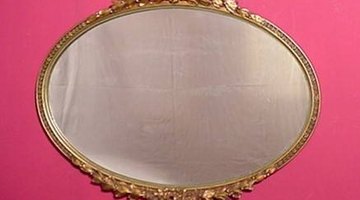
How to Restore Antique Mirrors

Over time, mirrors lose their shine. They may become smudged, scratched or dim. Their frames may become chipped, or the paint may be flaking off. For some people, the scratches, nicks, and smudges add charm to an antique mirror. Other people prefer the original features of the mirror to shine through.
Things You Will Need
- Re-silvering kit
- Sandpaper
- Paint
- Primer
- Small paintbrushes
- Painter's tape
- Newspaper
If you are one of the latter, read on to see what you can do to restore your antique mirror.
-
Clean and touch up paint. If your mirror simply needs a good cleaning and maybe some paint refreshing on the frame, it's an easy fix. Wash the mirror with hot, soapy water. When dry, remove paint flakes with sandpaper. Dab some primer into the bare wood areas, and paint. You may need to take the mirror to a paint store in to match the frame paint color exactly.
-
Repaint the entire frame. If you need to repaint the entire frame, first tape off the mirror with some newspaper, so you don't get paint on it. Then, sand off as much paint as you can. Spray a layer of primer on the frame and let dry. Then, spray on your new paint. Use a high gloss paint. If your frame is metal, use a paint made for metals.
-
Evaluate the mirror. Does it need to be re-silvered? Re-silvering a mirror is difficult and expensive. You may wish to just leave the nicks and scratches alone. If the mirror is in bad shape, read on for more options.
-
Replace the mirror. If you love the frame, but the mirror is beyond use, think about replacing the mirror.
-
Re-silver the mirror. You can purchase a re-silvering kit at a home improvement store. If the mirror is a valuable antique, however, consider hiring a professional to do the re-silvering.
Tip
Antique mirrors are not usually valuable, just old. The majority of them are not worth the trouble of re-silvering, unless the mirror has great sentimental value. If you are not sure of the value of your mirror, take it to an antique dealer to have it appraised.
Check out this related video from Homesteady on Youtube.
Resources
Tips
- Antique mirrors are not usually valuable, just old. The majority of them are not worth the trouble of re-silvering, unless the mirror has great sentimental value. If you are not sure of the value of your mirror, take it to an antique dealer to have it appraised.
Photo Credits
- www.antiques-finder.com
- www.antiques-finder.com
More Articles