Dried orange slices are surprisingly beautiful, perfectly suited to wintertime decorating and family-friendly crafts. The traditional method calls for drying the slices in a dehydrator or low-temp oven, but dried orange slices in a microwave are just as pretty and a lot faster: just the thing if you're crafting with impatient kids, or racing the clock to decorate before your holiday guests arrive. You'll need minimal equipment and relatively little time, and the process couldn't be easier.
Things You'll Need
Fresh, juicy oranges
Cutting board
A very sharp knife or mandoline slicer
Microwave-safe plate
Paper towels
Kitchen tongs
Wire cooling rack
Video of the Day
Getting Prepped for Dried Orange Slices
Your oranges will be the star of the show, so pick the best-quality fruit you can find. They should be firm, fresh and juicy for the best results. It's up to you whether you opt for large or small oranges, or a mix of different sizes (uniformity creates a nice look in some designs, but random sizes also have their charm). You might also want to add a few colorful varieties to the mix for visual interest, like deep-toned Cara Cara or ruby-red Moros if they're in season.
Video of the Day
Tip
You can expand your color palette even more by using the same technique for slices of lemon, lime and white or red grapefruit.
You'll need to make your slices relatively thin, anywhere from 1/8-inch to 1/4-inch, and get your slices as consistent as possible. They'll dry more evenly that way. You'll need a very sharp knife and a steady hand, or – if you have one – you can use a mandoline slicer for better consistency. You should get four to six good slices even from a small orange, and many more from a large one. You'll also need a lot of paper towels, so don't start this project if you're down to your last quarter-roll.
Dried Orange Slices in a Microwave
Step 1: Starting the Oranges
Place your oranges on a cutting board, and cut off one end. Set those pieces aside as you work (you can collect and juice them, or give them to the kids to nibble).
Tip
The instructions on most sites begin with cutting both ends from the orange, but leaving one in place works better. It gives you a "handle" to hold onto as you slice the orange, and it means you'll get more high-quality slices from each fruit (with less risk to your fingers).
Step 2: Slicing the Oranges (Knife)
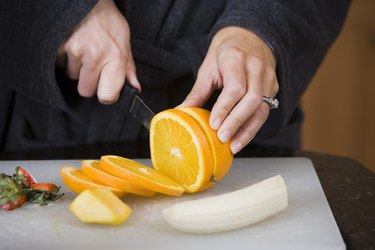
Position your knife 1/8- to 1/4-inch from the cut end, and make a smooth, even slice. Drop that slice a few inches away, so you'll have room to keep working, and then make a second slice the same thickness as the first. Keep going until the remaining end of the orange is too small to yield another good slice, then set it aside with the other ends.
Step 3: Slicing the Oranges (Mandoline)
Place your orange cut-side down on the body of the mandoline, and place the hand guard firmly on top of the orange. If your hand guard has metal prongs to hold foods in place, push them well into the orange's skin. Slide the orange across the blade with a firm stroke, then draw the blade back to the top. Repeat until the orange is too small to yield another good slice, then remove it from your hand guard and set it aside with the other ends.
Step 4: Evaluating Your Slices
Repeat until you've got the number of slices you want, or until you run out of oranges. Set aside any slices that are ragged, uneven or lopsided, and drain any juice that may have accumulated.
Step 5: Filling the Plate
Fold up to five or six layers of paper towel on a microwave-safe plate. These will absorb the juices from the oranges as they're heated. Arrange orange slices around the plate in a single layer, making sure they don't quite touch and aren't overlapping at any point. Cover them with another five thicknesses of paper towel.
Step 6: Begin Drying the Orange Slices
Slide the plate carefully into your microwave, and and heat the oranges for six or seven minutes on the defrost setting. The timing isn't crucial at this stage; you just need to let them go until the bottom layer of towels is saturated with juice.
Step 7: Change the Towels
When the cycle ends, remove the plate from your microwave, lift off the top layer of towels, and then slide the sodden stack of towels and oranges back onto your cutting board. Line the plate with five new layers of towel, and use a pair of tongs to transfer your orange slices back to the plate. Cover them again with the top set of towels, and return them to the microwave for a further five minutes or so.
Step 8: Test the Orange Slices
Remove the slices from your microwave again, and lift away the top layer of towels. Prod them gently with a fingertip, and check their texture. If they still feel a bit wet, change the towels if necessary and then pop them back into the microwave for another minute or two. The slices should have a jelly-like texture when they're done.
Step 9: Cool the Orange Slices
Transfer the orange slices to a metal cooling rack with your tongs, and repeat the microwave process with your remaining slices until you've dried them all. Let the slices rest for a minimum of 45 minutes to one hour, during which time they'll cool and harden. At this point you can use them immediately for crafts, or store them in an airtight jar for later use.
Tip
Save those little packages of silica gel that sometimes come inside the bag with your new appliances and kitchen gadgets. Dropping one into your jar of oranges will help keep them dry, and forestall any mold.
The microwave method works best for small- to medium-sized batches of orange slices. If you're preparing a large batch, it's probably more efficient to fall back on the dehydrator or oven methods, which take longer but are better suited to bulk preparation.