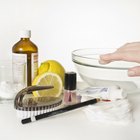
The Nailene Acrylic Sculpture Kit is a manicure kit that allows you to do your own acrylic nails at home. The kit comes with 20 French nail tips, 20 natural nail tips, acrylic powder, acrylic liquid, nail glue, buffer and sculpting brush. Applying your own acrylic nails can be tricky at first, so be sure to take your time and follow all instructions carefully.
Preparing Your Nails
Swipe a cotton ball soaked in acetone nail polish remover over your natural nails.
Wash and dry your hands thoroughly.
Gently buff your natural nails with the purple side of the buffer for maximum glue adhesion.
Push back your cuticles carefully.
Applying Nail Tips
Match nail tips to the width of your natural nails. File the sides of the nail tips with the green side of the buffer if necessary.
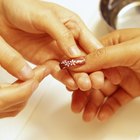
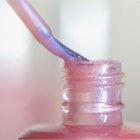
Apply a small dot of glue to the tip of your natural nail.
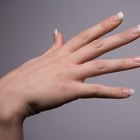
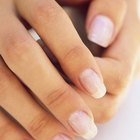
Place the Nailene nail tip on your natural nail between the pink of your nail bed and the white free edge of your nail. Press the tip down firmly and hold for 10-15 seconds.
Applying Acrylic Overlay
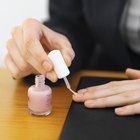
Pour a small amount of acrylic liquid into a glass bowl. Do not use a bowl that will be used for eating or drinking in the future.
Open the acrylic powder and place the container next to the bowl of acrylic liquid.
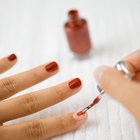
Using the sculpting brush, brush a small amount of acrylic liquid onto your nail.
Dip the brush in acrylic liquid again and tap it on the bowl’s edge to remove any excess liquid.
Drag brush lightly over the acrylic powder until a small ball forms on the brush’s tip.
Place the acrylic ball over the seam where your natural nail meets the Nailene nail tip.
Using the side of the sculpting brush, flatten the acrylic ball across the entire seam and the Nailene nail tip.
Dip the brush in acrylic liquid again and gently swipe over your nail for smoother results.
Clean the brush by dipping in acrylic liquid and wiping it off with a paper towel.
Apply a second coat of acrylic to the nail. Placing the acrylic ball in the center of your nail this time, pat the ball down to the cuticle. Gently brush forward to blend.
Brush acrylic liquid over the entire nail for a smooth finish. Allow the acrylic to dry.
Smoothing Your Acrylic Nails
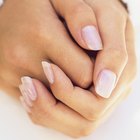
Using the purple side of the buffer, gently buff your acrylic nails until they are smooth and even.
Refine the nail surface with the white buffer.
Wash your hands in cool water to remove acrylic dust. Apply nail polish or a clear top coat, if desired.
Related Articles

How to Fill in Nails
How to Get Shiny Acrylic Nails at Home
How to Apply "Tip and Dip" Nails ...
How to Soak Acrylic Nails off in Nail ...
How to Put an Acrylic Nail Back on ...
How to Get Natural-Looking Acrylic Nails
How to Do Your Nails to Look Like You ...

Can Sweet Almond Oil Be Used to Soften ...
How to Whiten Natural Nails
How to Keep Your Pink & White Nails ...
How to Paint Nails Light Pink
How to Get Acrylic Off of Cuticles

What Are Acrylic Fills?
How to Get a Smooth Surface When ...
How to Get Nails White
How to Remove Nail Tips

How to Take Off No-Chip Nails
How to Use Sanding Blocks for Nails

How to Round Your Nails
How to Apply Nail Polish Without Streaks
Writer Bio
Heather Kimbrell began writing professionally in 2009. Most of her work is featured online, where she publishes health and technology articles. She is a certified medical assistant and a part-time PC technician. Before pursuing a medical-assisting career, she received information technology training from Cisco Networking Academy. Kimbrell earned an associate degree in medical assisting from Fortis College of Montgomery, Ala.