Things You'll Need
2 cups baking soda
1 cup cornstarch
Mixing bowl with stirring spoon
1 1/4 cups water
Large saucepan
Toothpicks
Sand
Acrylic paints
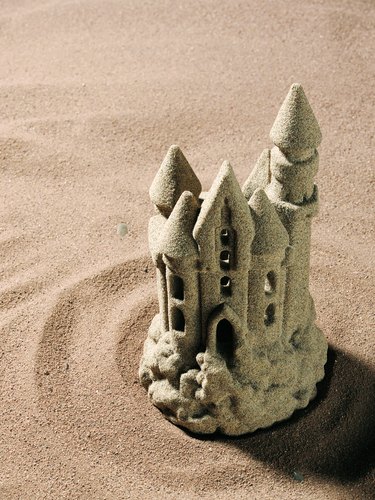
Sand castles are fun to make at the beach or in a sand box, but the sculptures are short-lived. Waves and rain will wash the castles away. To make permanent sand castles, use baking soda to make clay, mold the sculpture, dry, and paint the finished sand castle.
Mix the Clay
Step 1
Measure 2 cups of baking soda and 1 cup of cornstarch in a mixing bowl. Mix together, with a stirring spoon to blend the ingredients. Once blended together, transfer the dry ingredients to a large saucepan.
Video of the Day
Step 2
Turn the stove burner on to medium heat. With the dry ingredients in the pan, add 1 ¼ cups of cool water. Stir until smooth, and continue stirring until the mixture comes to a boil. When the mixture reaches a consistency of mashed potatoes, turn the heat off and remove the saucepan from the stove.
Step 3
Cool the mixture. Transfer the clay to another dish and cover it with a damp cloth. Once it is cool enough to handle, knead until the consistency is smooth and elastic. Place the clay in a plastic bag in the refrigerator for at least one hour before using.
Make the Sand Castle
Step 1
Break off a chunk of the clay and begin to mold a sand castle, using your hands to shape the building. For small details, use toothpicks to carve windows, doors or other architectural details on the structure.
Step 2
Add sand to the outside of the castle. For a more natural look, sprinkle sand onto the castle.
Step 3
Dry the castle. The clay will harden in 12 hours or can be accelerated by placing in an oven at 300 degrees F for 15 minutes or until hardened.
Step 4
Paint details. Using acrylic paint, highlight areas on the castle such as the doors or windows. Allow to dry overnight and the castle is ready for display.
Tip
To store unused clay, refrigerate in a plastic bag.
If a piece breaks off while working with the clay, roughen the areas that need to be joined together by scoring the ends with a fork or toothpick, brush on water and join.
Warning
Do not allow children to use the stove unsupervised.
Cracks can appear in the sculpture after drying. If you see cracks, fill with fresh clay and re-dry the sculpture.
Video of the Day