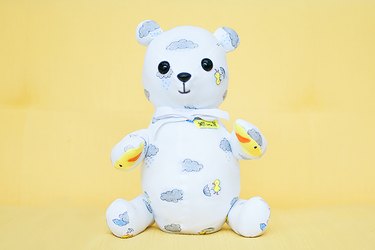
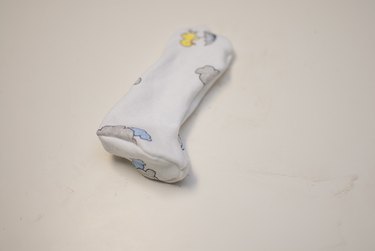
When your kids outgrow their baby clothes but they still mean too much to throw away, turn them into a stuffed animal so you can enjoy them for years to come. Sewing a stuffed animal is not the easiest project to complete and will require intermediate sewing skills. However, it can be done with a basic sewing machine and minimal hand sewing.
Video of the Day
Things You'll Need
Fabric scissors
Pattern weights
Pins
Sewing machine set to a medium straight stitch and medium tension
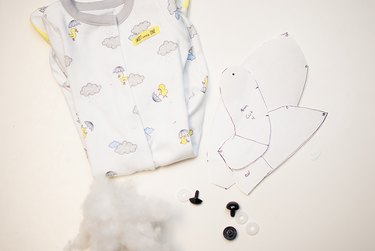
2 shank eyes with washers
1 shank nose with washer
32-ounce bag of fiberfill
Needle for hand sewing after stuffing
Embroidery floss (optional for mouth)
Tip
- The pattern just fit on a 3-month-old-sized footed sleeper. You may want to combine baby clothing to cut all the pieces or use a larger size.
- If the clothing is made from knit fabric, use a ballpoint needle on your machine.
Cut out the Pattern Pieces
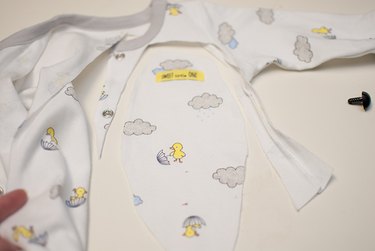
Because there is limited space, plan the layout carefully when cutting out the pattern pieces. Mark the body and head pieces on the body of the sleeper. Then cut the legs and arms from the legs and arms on the sleeper. Think about the details you want to include in the bear, such as a tag from the clothing or decorative feet. Cut out all of the pieces as instructed.
Video of the Day
Sew the Head
Step 1
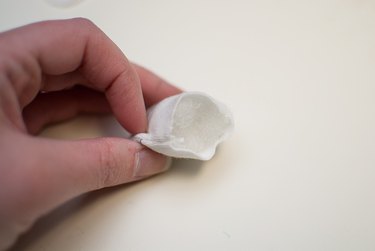
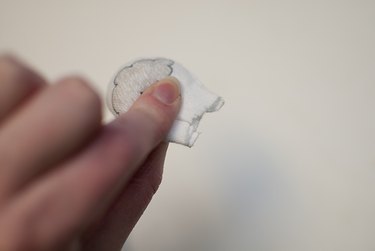
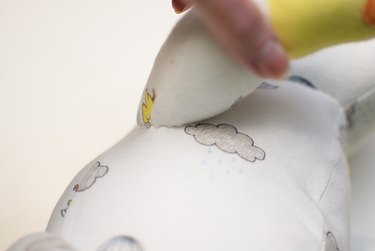
With right sides together, sew the two ear pieces together along the curve. Repeat with the other ear.

Step 2
Turn the ears right-side out, and then place a small amount of fiberfill in each ear. Then set them aside for the moment.
Step 3
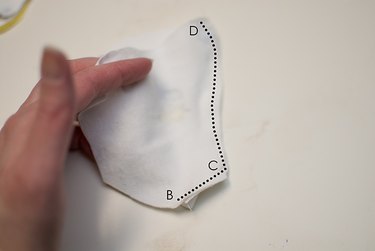
With right sides together, sew one face side piece to the top head piece by matching up points B, C and D and sewing between them.
Tip
Lift the sewing foot and pivot at each point while sewing to avoid a pucker.
Step 4
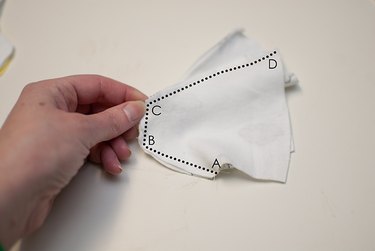
With right sides together, sew the other face side piece to the top head piece by matching up points A, B, C and D and sewing between them.
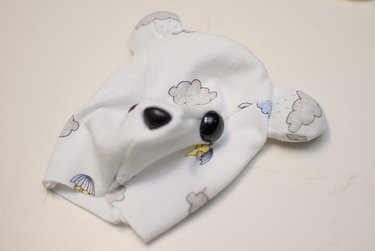
Step 5
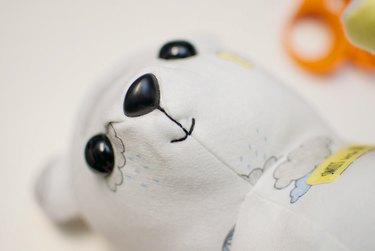
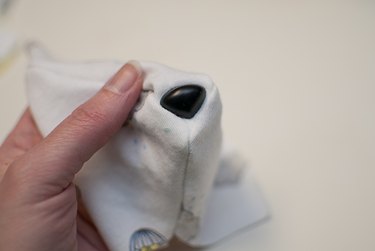
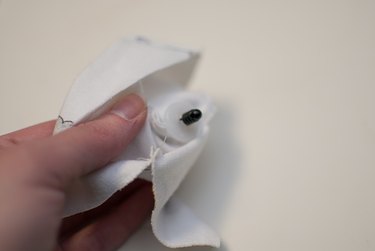
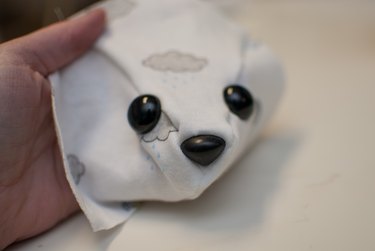
Turn the face right-side out. Cut a small hole at the bottom of the top head piece (at point B), and then add the nose.
Step 6
To secure the nose in place, add the washer to the backside.
Step 7
Cut two small holes for the eyes, about 1 1/2 inches from the nose on the sides of the face. Then add the eyes and the washers on the back.
Warning
Secure the eyes and nose well, so they won't be a hazard for small children.
Step 8
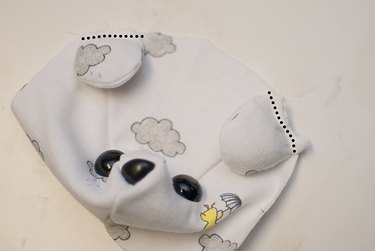
Fold the bottom of the ears to add a small pleat. This gives them a little extra shaping.
Step 9
Sew the ears to the top head piece right on the seam (at D).
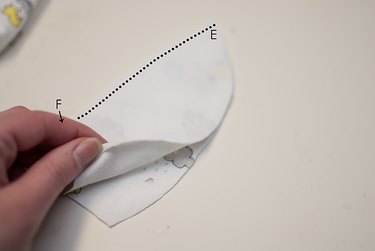
Step 10
With right sides together, sew the back head pieces together by stitching between points E and F.
Step 11
With right sides together, sew the front and back head pieces together between points G and E.
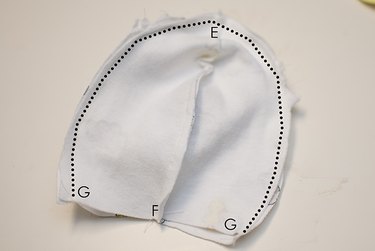
Step 12
Turn the head right-side out and set aside for later.
Sew the Body
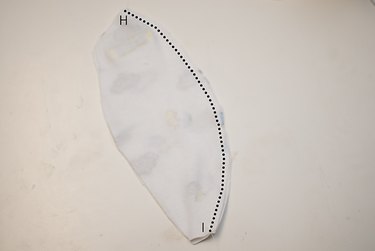
Step 1
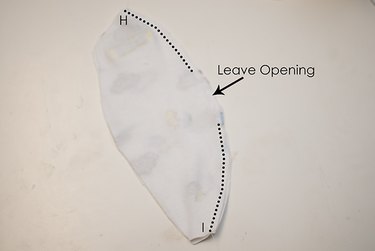
With right sides together, sew the front bodice pieces together between points H and I.
Step 2
With right sides together, sew the back bodice pieces together between points H and I, but leave a 2-inch opening in the center back.
Step 3
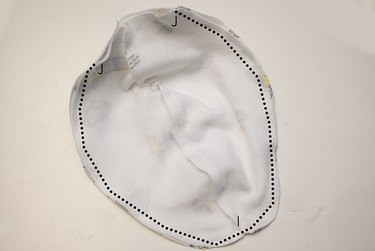
With right sides together, sew the front and back bodice pieces together between points J and I, leaving only the neckline open.
Attach the Head and Body
Step 1
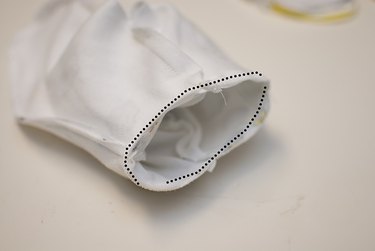
With the head right-side out and the body inside out, place the head into the body so that the necklines match up. Match up the seam of the center front face with the seam of the center front bodice. Each seam around the neckline of the head and bodice will match up. Sew along the neckline.
Step 2
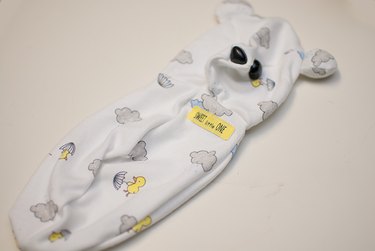
Using the opening left in the back bodice, turn the bear right-side out.
Step 3
Fill the bear bodice and head with fiberfill.
Tip
When filling a stuffed animal, fill until the body is firm and you can't fit any more stuffing. The stuffing will settle over time, and an under-stuffed bear will become limp.
Step 4
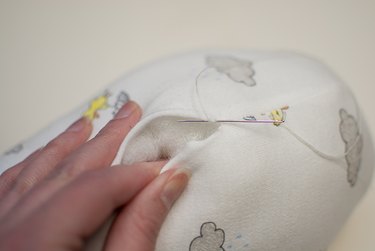
Using a slip stitch, or an invisible stitch, sew the back opening closed.
Sew the Limbs
Step 1
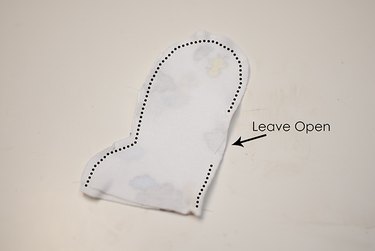
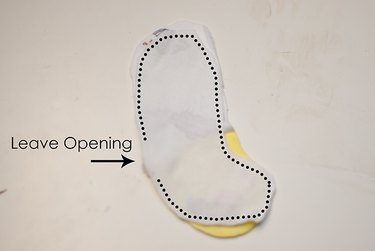
With right sides together, sew two leg pieces together along every edge except the bottom edge. Also, leave a 1-inch opening in the backside of the leg. Repeat for the second leg.
Step 2
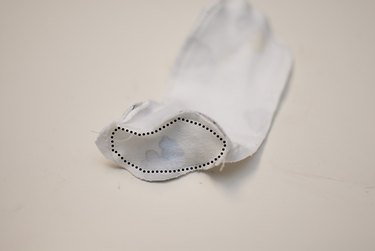
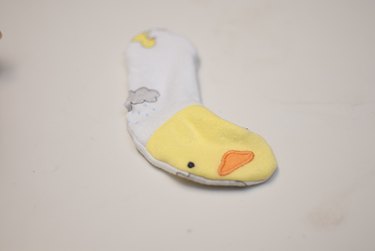
With right sides together, sew one foot piece to the bottom opening in the leg pieces. Repeat for the other foot as well.
Step 3
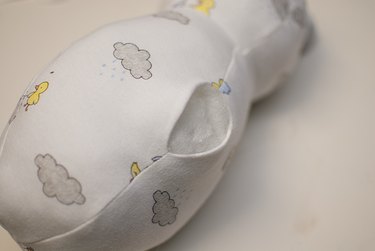
Turn the leg pieces right-side out. Then fill with fiberfill and sew the opening closed just like you did for the body.
Step 4
With right sides together, sew two arm pieces together all around the edges, leaving a 1-inch opening. Repeat for the other arm as well.
Step 5
Turn the arms right-side out. Add fiberfill and sew the opening closed just like you did for the bodice and legs.
Attach the Limbs
Position the arm just down from the neckline along the side seam. Then using a slip stitch, attach it to the body by sewing just under the top of the arm and sewing it to the body, stitching in a circle. Repeat with the other arm on the other side. Then position the leg along the side seam as well so it is flush with the bottom of the body. Sew the leg on the same way as the arms. Repeat with the other leg.
Add Stitching to the Face
Last, if you desire, add stitching under the nose for the mouth. Use a simple running stitch or backstitch, following the seam line under the nose to add the mouth detail.