Things You'll Need
1/8-inch by 3/4-inch wood strips
Packing tape
Jigsaw
1/2-inch wood panel
Marker
Screws and drill
Wood glue
Sandpaper
Paint or finish (optional)
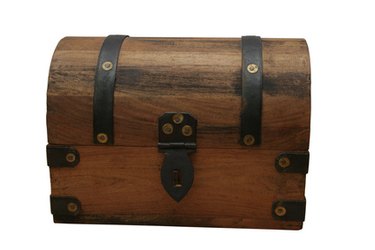
The word "chest" often refers to any wooden box used for storage, usually with a top-mounted and hinged lid. A lot of them have a rounded dome top, semi-circular. If you have built the bottom of one of these for a toy chest or for bedding storage, you may want to give it that rustic-looking top. There is a simple way to build it.
Step 1
Cut the wooden strips to match the length of your wooden chest. Cut enough of these slats to cover the top of your chest and extra slats to cover about 1/4 of the top.
Video of the Day
Step 2
Place all of the slats side-by-side, parallel to each other. Tape the pieces together using packing tape. Place loops of tape a few inches from the left and right ends of the slats. You should have a unit you can bend and pick up.
Step 3
Cut the first and last slat on the panel to a 45-degree angle.
Step 4
Hold the panel made of slats over the top of your chest. Bend the slat panel so it forms a dome on top of your chest. If your top is too high or too low, add or remove some extra slats. Put a piece of tape across the bottom of this dome to hold it in place. The tape across the bottom should just attach to the first and last slat.
Step 5
Measure the width of your chest. Mark that width on the bottom-left of your 1/2-inch wood. Measure and mark 1-1/2-inch up the left side. Extend these marks to form a rectangle 1-1/2-inch by the width of your chest.
Step 6
Hold the curved slat panel so it touches the upper corners on your rectangle. Trace the inside if the slat panel onto your piece of wood. Rotate the wood 180-degrees and repeat this and the previous step to make a second side panel.
Step 7
Cut out the pieces of wood which make up the side panels.
Step 8
Measure the length of the chest again, and subtract 1-inch from that number. Measure and mark the minus 1-inch length onto the bottom-left of a piece of 1/2-inch piece of wood. Measure 1-1/2-inch from the bottom-left corner. Extend the lines again to make another rectangle. Repeat to make a second piece.
Step 9
Cut out the side pieces. These become the front and back of the chest lid.
Step 10
Glue and screw the two side pieces and the front and back pieces together to form a rectangle. This should fit over the top of the chest with a flat bottom. Leave the piece to dry overnight.
Step 11
Spread glue along the top of the curved pieces on the lid.
Step 12
Remove the tape from the slat panel, and place all of the slats on the lid. Start with the 45-degree cut pieces. Place the slats over the lid and glue them down. Place tape over the lid to keep the slats in place.
Step 13
Sand the lid smooth.
Tip
Finish or paint the lid to match the chest at the bottom and give it a completed look. If you are painting it for a kid's bedroom, giving it a pirate theme matches well with the style of chest.
Video of the Day