Things You'll Need
Small, unfinished wooden bowl
Acrylic paint (optional)
Waterproof marker
¼ pound each paraffin and beeswax
Paintbrushes
Small plastic "pony" beads in bright colors
Tweezers (optional)
Clear acrylic sealer
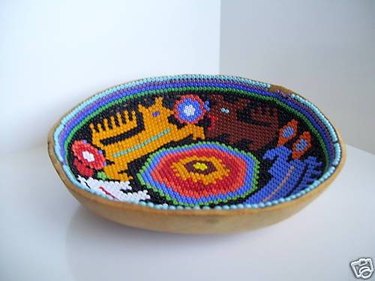
The Huichol people of Mexico are expert at crafts involving the application of beads or yarn to create mosaic-style designs. Most of their artwork involves fewer than ten colors, although some pieces have as many as 50 colors. Few pastel shades are used; black and shades of red, orange, blue, purple and yellow are most popular. Huichol designs often include animals, plants and celestial objects, all representative of their shamanic faith. The most common Huichol art pieces are wooden objects or wooden pictures that have been coated with a thin layer of wax. Beads or lengths of single-ply yarn are pressed into the wax to create the pattern. A Huichol-style beaded bowl is a simple beginner project.
Step 1
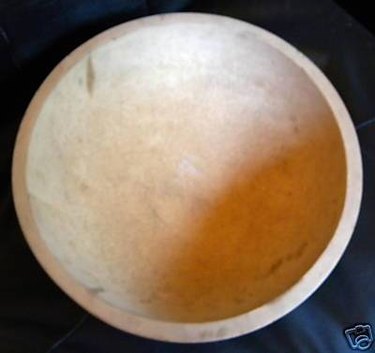
Use a smooth, unfinished wooden bowl from a craft store; if desired, paint the outside of the bowl a solid color and let it dry thoroughly.
Video of the Day
Step 2
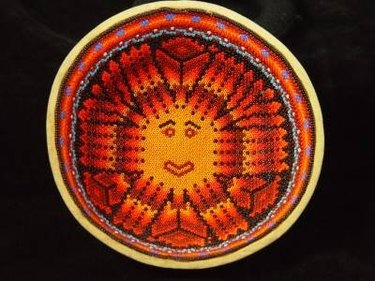
Sketch your design on the inside of the bowl with a waterproof marker. Stick with a simple, central pattern for your first project. A sun, crescent moon or flower might be good choices.
Step 3
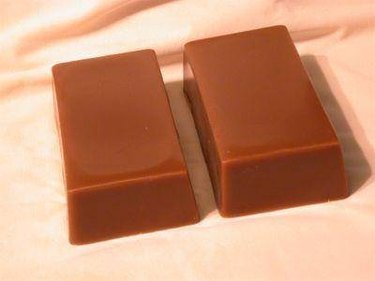
Melt a mixture of half beeswax and half paraffin in a small, microwavable bowl until the wax is liquified. Coat the inside of the wooden bowl with the softened wax using a 1-inch, flat paintbrush. The layer of wax must be the thickness of half the height of the beads you will be using. Don't paint it on so thickly that it obscures your design, but it must be thick enough to hold your materials in place. Wax should be tacky at room temperature.
Step 4
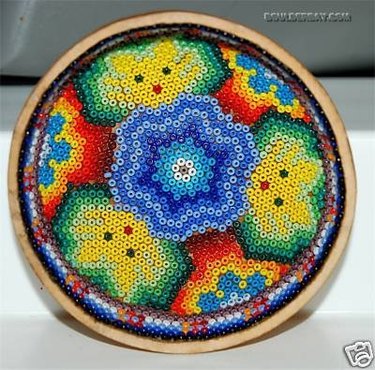
Apply the beads in rows or spirals, beginning at the inside of the design. Make the center of the design a solid color. Beads should lie flat, with their holes facing up. Use tweezers to hold the beads if it's difficult to apply them with your fingers.
Step 5
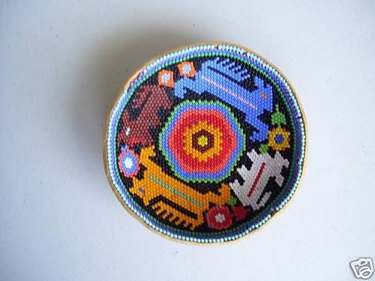
Build your design up toward the edges, keeping the colors symmetric for the most professional look. Use stripes or V-shaped patterns of beads to fill in solid areas. Vary the colors, keeping the design simple and bright. Stop your beadwork just short (about one bead's width) from the upper edge of the bowl. Let you work rest in a cool place to set the wax.
Step 6
Coat the inside of the bowl with an acrylic sealer at room temperature; apply the sealer gently to avoid disturbing the beads. The sealer will help seal the beads to the bowl and to each other to preserve the design.
Warning
Beaded bowls are intended for decorative purposes only; don't use them for food or storage. Keep your beaded bowls away from heat.
Video of the Day