Things You'll Need
Frame
Ruler
Offset framing clips
Awl (optional)
Acid-free framing tape, double-sided
Acid-free backing paper
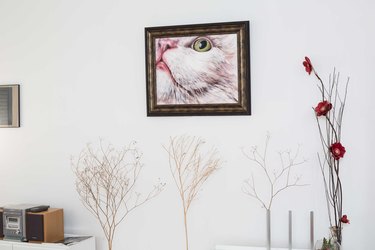
Unlike paper-based watercolor painting, an oil painting on canvas should not be framed behind glass. Quality varnish designed for oil -- not a glass cover -- is what keeps an oil painting safe from dirt, which would otherwise accumulate on the canvas and permeate into cracks over time. An acid-free paper backing -- rather than cardboard -- allows the painting to breathe or dry; varnished oil paintings can take several years to fully dry. Framing a canvas that's mounted on a wood stretcher, using a size-appropriate frame is a relatively easy do-it-yourself project.
Step 1
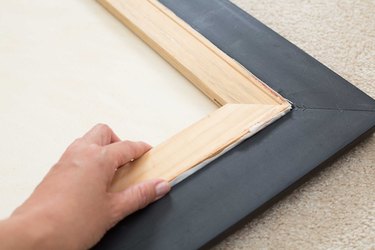
Lay the frame right-side down. Insert the artwork into the opening, resting it on the ledge or rabbet cut in the molding. Check that the picture is positioned the right way according to the frame's hanger. The canvas's wood stretcher likely sits higher than or protrudes out from the frame back, but that's OK.
Video of the Day
Step 2
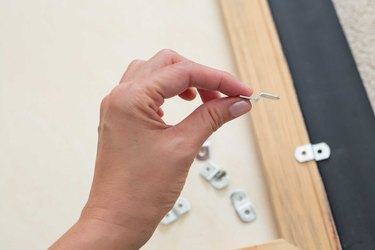
Measure the depth or distance that the canvas protrudes from the frame so as to select the right-sized offset clips. Roughly center one "Z"-shaped, step-like clip over the canvas edge and onto the frame back at the top and bottom and on each side. Affix the clips in the back of the frame and canvas stretcher through the clips' holes to hold the canvas in place securely and evenly, using their included screws. Form starter holes with an awl, if you like.
Step 3
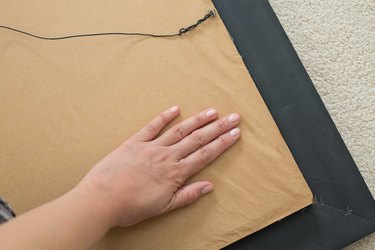
Place double-side backing tape on the frame, around the canvas, sticky-side down, without overlapping the lengths. Cut the backing paper to size to reach the outer tape edges, allowing for any depth created by a raised canvas. Remove the tape's waxy paper to expose the top sticky side. Cover the canvas back with the paper. Smooth it neatly over the tape, using your fingers.
Tip
Typical oil-painting frame sizes match typical canvas sizes. If your canvas isn't a standard size, have the frame custom made at a matting and framing shop, or consider hanging it without a frame, if it has a durable wood stretcher.
Warning
Acidic framing materials damage artwork over time. Only use acid-free products designed for oil paintings.
Unprofessional framing can damage and devalue art. Have valuable or favorite pieces framed professionally to avoid damage.
Video of the Day