Regular nail polish has a tough time standing up to daily stresses like hair washing and that last pile of dishes. Acrylic nails will see you through two to three weeks of tasks, all while creating the look of strong and healthy nails. If the color you initially chose for the acrylics isn't suiting your look, a polish change can hold you over to your next fill. Changing acrylic nail polish requires a different removal process to avoid lifting the acrylic nail, but the right techniques are fairly easy to master.
Changing it Up
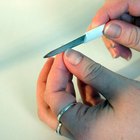
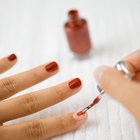
To prep your nails for polish removal, use a nail brush and an antibacterial soap to remove all dirt or chipped polish. Soak a cotton pad in acetone polish remover and scrub each nail until the polish is removed. Acetone removers are stronger than their non-acetone counterparts, cutting through the thick polish with ease and strengthening your nails to avoid cracking. Dry your nails completely with a clean towel. Position the nail brush at the base of your nail and sweep the new color on in one stroke. Allow the color to dry and apply one more coat. Seal the color with one layer of an acrylic top coat.
Custom Designs
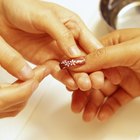
Add custom designs to your acrylic nails to set your look apart. For glittery nails, dip the mixed acrylic into finely milled glitter and apply it to the nail in a thin layer with the glitter facing up. This will ensure that there is less glitter than resin, keeping the nail strong. Dip a toothpick into acrylic polish and dab it over the nails to create a polka-dot pattern. Experiment with creating your own drawings using a small paintbrush and a color that contrasts with the base coat.
Types of Polish
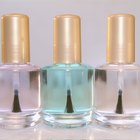
Acrylic nails are made of a resin that is a blend of liquid and powder. The primary ingredient is Ethyl Methacrylate in traditional acrylics, but a water-based solution has also been developed as a more environmentally friendly option. Nails are primed with an acid-based primer that helps the resin to adhere to the natural nail. Technicians mix the acrylic liquid and powder, and apply it over top of nail-shaped forms on the fingertips. The resin is then shaped as it dries and the form is rolled off to secure the acrylic to the nails. Once dry, the tips are buffed and nails are painted with a regular polish. Acrylic nails should be finished with a top coat, preferably anti-fungal to prevent infection if the nail becomes cracked.
Nail Care
Acrylic polish lasts longer with daily maintenance. Wear gloves if your hands will be submerged in water for an excessive period of time, and always thoroughly dry your nails after washing your hands. This will prevent water from penetrating the polish and nail and help avoid infection. Use emollient oil-free hand cream every morning and night to keep nails hydrated and avoid cracking. Keep your hands away from essential oils that could break down the polish and nails.
Related Articles

How to Do Fading Nail Polish

Can Sweet Almond Oil Be Used to Soften ...

How to Make Your Nails Hard
What Is a Full Set Manicure?
How to Regrow Nails

Cures for Acetone Damaged Nails

Difference Between Acrylic & Sculptured ...

Nail Experts Strong Results Directions
How to Remove Acrylic Nails Without ...
How to Remove Acrylics With Acetone and ...
Differences Between Top Coats & Base ...

How to Repair Damaged Nails
How to Get Acrylic Off of Cuticles

How to Use Sanding Blocks for Nails

How to Mix Two Nail Polishes
How Does Nail Polish Protect ...
How to Remove Pink & White Nails

How to Round Your Nails

Why Would Nail Polish Crack After ...
How to Do Your Nails to Look Like You ...
References
Writer Bio
Celeigh O'Neil has been writing professionally since 2008. She has a Bachelor of fine arts from the University of Ottawa, as well as degrees in fashion illustration/design, digital arts and certification in hair and makeup artistry. O'Neil was a frequent contributor to Toronto's "Dialog" newspaper and has worked as an instructional writer, creating lessons in fashion, art and English for students of all ages.