Things You'll Need
Balloons
Cardboard paper tubes, such as the centers of paper towel roles
Newspaper, ripped into 1 1/2-inch wide strips
Flour and water, mixed into papier-mâché
Large plastic bowl
Utility knife
Fiberglass cloth and resin
Rubber gloves
Masking tape
Long straight pins
Medium-grit sandpaper
Spray paint primer
Water-based poster paints
Brightly-colored crepe paper streamers

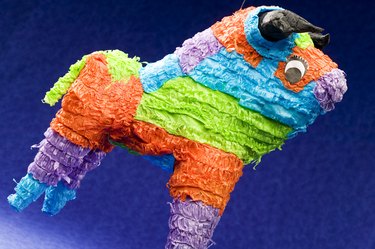
The pinata's history dates back to 14th century Europe, and to China before that. In Italian, "pinata" means "fragile pot" and early versions may have been clay pots suspended from ropes. These days, pinatas are party favorites that are suspended in the air and filled with candy, ready for party-goers to try and break open the treat-filled toy. For those who want to play a practical joke, an indestructible pinata is made by combining a few readily available household items.
Making the Pinata
Step 1
Use the balloons, paper tubes and masking tape to build the form for the pinata. Blow up the balloons, and tape the different pieces together into the desired shape, such as an animal or holiday figure.
Video of the Day
Step 2
Cover the figure with newspaper soaked in papier-mâché compound. After ripping the newspaper into strips, dunk the strips into a mixture of water and household flour. When you take the newspaper strips out of the papier-mâché, pull them gently between your first two fingers to remove excess paste. Lay the strips over the balloon framework, and slowly build up the desired shape. The newspaper will dry, and form a rigid shell over the pattern.
Step 3
Allow the first layer of papier-mâché to dry thoroughly, and then apply a second layer to strengthen the figure. If you lay too many layers of papier-mâché on the figure at one time, the top layers will dry while the lower layers will remain moist and soft. Two thin layers are always better than one heavy one.
Step 4
After the figure is dry, use a long straight pin and pop the balloons inside the pinata. Simply push the pin into the body until you hear the balloons pop. Then, take a utility knife and cut a small round opening in the top of the pinata. You will use this hole to insert candy and treats for your guests.
Reinforcing the Pinata
Step 1
Apply a third layer over the pinata, but rather than using papier-mâché, use fiberglass cloth and resin. Used for automotive repair and boat building, woven fiberglass cloth is very difficult to break.
Step 2
Cut the fiberglass cloth into workable size strips. Since you already have a shaped pinata, you do not need to cut them into thin strips like the newspaper. Once it's treated with resin, the fiberglass cloth stretches and forms itself easily over uneven surfaces.
Step 3
Mix the fiberglass resin with chemical hardener. Only mix as much resin as you can use in 15 to 20 minutes. After this time, the resin begins to chemically harden.
Step 4
While wearing gloves, dip the cloth in the resin. Wipe the excess resin off the cloth as you remove it from the resin, and apply the treated fiberglass cloth to the pinata. Overlap the pieces of fiberglass by 1/2 to 1 inch, and create a fiberglass shell round your fragile, paper pinata. Allow the fiberglass to dry according to manufacturer's instructions.
Painting the Pinata
Step 1
Sand any rough edges or bumps off the pinata after the fiberglass dries. The pinata will be durable, and virtually unbreakable at this point.
Step 2
Spray a coating of primer spray paint on the entire project. The water-based poster paint, which is typically used to paint a papier-mâché pinata, will not stick to fiberglass. The spray paint primer will adhere to the fiberglass covering, and prepare the pinata for the final painting.
Step 3
Apply brightly-colored poster paint to disguise the indestructible pinata, and decorate the project with 2-inch-wide crepe paper streamers. The stretchable plastic crepe paper is easy to use, and will also completely disguise the fiberglass.
Video of the Day