Things You'll Need
Circular bubble level
Needle-nose pliers
The addition of a pendulum to the mechanical clock improved its accuracy and allowed a more precise measurement of time. However, pendulum clocks rely on another mechanical device to work properly, and that device is known as the escapement. The torque or power that is developed within the clock gear train via springs or weights, is released to the pendulum through the escapement, and it is the equal distribution of power that keeps the pendulum swinging. Adjusting the pendulum escapement therefore, is adjusting the pendulum's relation to the escapement to bring it into harmonious equilibrium. The clock owner can accomplish this task in 10 minutes with a minimal amount of tools.
Step 1
Open the access panel of the clock case where the pendulum is located. If the pendulum is in motion, bring it to a stop by placing a finger or a hand in its path.
Video of the Day
Step 2
Place the circular bubble level beneath the pendulum. If space restrictions do not allow the level to rest under the pendulum, place it in front or behind the pendulum.
Step 3
Correct the position of the clock case front to back and side to side by either turning the adjustable feet of the clock case or placing thin cardboard shims under the corners and sides until the case is perfectly level.
Step 4
Move the pendulum to either side slightly with a finger or hand and then release it.
Step 5
Listen to the sound of the ticking. As the pendulum swings, the sound that should be heard is an equal "tick-tick" sound rather than an uneven "tick- - -tock" sound. This is a conspicuous sound that will indicate the specific pendulum escapement adjustment needed.
Step 6
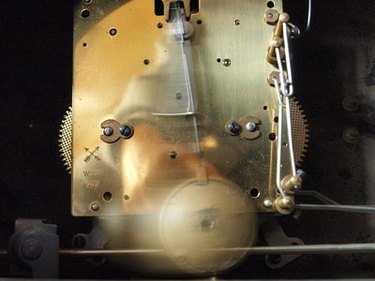
Use the needle-nose pliers to make the necessary adjustment. The crutch is the thin brass rod that connects the escapement to the pendulum. It extends from the upper part of the clock movement down along the pendulum suspension rod and loops once around the suspension rod at its bottom point. Bend the crutch rod while supporting it with the other hand.
Step 7
Stop the pendulum and bend the crutch near its middle slightly to the right with the needle-nose pliers if the stronger "tick" is to the right. Likewise, if the stronger sound is on the left, bend the crutch slightly to the left. Set the pendulum back into motion and continue listening.
Step 8
Repeat this process until the equilibrium is established and the sound that is heard is a clear and distinct "tick-tick", which indicates the pendulum clock escapement is correctly adjusted.
Tip
Many clocks use a friction clutching device which is connected to the escapement and does not require a bending of the crutch with pliers. In these applications, the crutch can be pushed to the respective side gently to the point of resistance, and then a small amount beyond this point to make the required adjustment.
A method of identifying the difference between a crutch that requires bending and one that does not is that the thin round crutch lever can be bent while a wider, flat crutch will use a friction device.
Whichever of the methods used, more than one adjustment may be required. There is no set standard of measuring the adjustments. Make small adjustments and listen carefully after each one.
Warning
Always work with care when making the pendulum clock escapement adjustments.
Be aware of any and all clock warranty information. Be certain to follow all manufacturer recommendations.
Video of the Day