Things You'll Need
Paper
Cardboard
Scissors
Fabric
Batting
Pins
Sewing machine
Thread
Binding
Fabric marking pencil

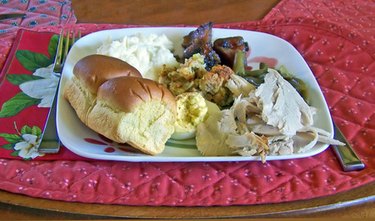
Place mats sit on a table underneath a plate to help protect the table from food or drink spills. They can go on top of a tablecloth or just right on the table. Place mats are an easy way to decorate a kitchen or dining room for the season or just to dress it up a bit. Most place mats you see are rectangular, but you can make oval ones as well. They fit a little better on smaller or circular tables. Oval place mats give a table a softer look because they don't have sharp corners or edges.
Preparing your Place Mat
Step 1
Cut an oval shape out of cardboard. It should be large enough for your plates and silverware to sit on, plus extend a few inches. If you don't know how to eyeball a size, cut a piece of paper the same size as a rectangle place mat. Fold the paper into fourths, then cut the loose corners on a curve. When you unfold it, you will have an oval. Trace this onto the cardboard.
Video of the Day
Step 2
Lay the cardboard pattern on to the fabric you want to use for your place mats and trace around it with a fabric marking pen or pencil. Make sure to lay it on the wrong side of the fabric.
Step 3
Cut out as many shapes as you want for your place mats. You will need two pieces for each place mat. You can make both sides the same or make them different so that you can flip them over for a different design.
Step 4
Trace and cut out one piece of batting per place mat. They should be the same oval shape as the place mats.
Sewing the Place Mat
Step 1
Lay the backing fabric on the table, right side down.
Step 2
Place a piece of batting on top, followed by a top piece of fabric.
Step 3
Pin the three layers together along the edges.
Step 4
Sew the three layers together along the edges with a 1/4- or 1/2-inch seam. Make sure to catch all three layers.
Step 5
Trim the seams close to the stitching.
Step 6
Pin the binding around the edge of the place mat and sew in place.
Step 7
Repeat with the other place mats.
Tip
Use the binding on the edges and not just a ribbon or trim. The binding will deal well with the curves.
You could also make a circular place mat with this same format. Simply cut a circle out of cardboard for your pattern.
Video of the Day