
How to Build a Bookshelf Out of Cinder Blocks and Boards

A bookshelf constructed of cinder blocks and boards provides practical and economical storage for your magazines, books, CDs and vinyl records. Just as importantly, when you deck out your wall with a cinder block bookcase you're creating the visual centerpiece for a minimalist room design.

You can finish up the room's decor with an eclectic mix of hand-me-down heirlooms and thrift-shop bargains. The bookshelf makes use of the most commonly used materials in modern construction -- wood and concrete blocks.
Things You Will Need
- 6 8-by-8-by-16 cinder blocks
- 3 1-by-10 boards cut to length
Tip
You can paint or stain the boards and the cinder blocks before assembling them into bookshelves. Cinder blocks are known within the building trade as CMUs, which is short for concrete masonry units. Place heavier items on the lower shelves to prevent your bookcase from becoming top-heavy.
Warning
Do not build a bookshelf from unsecured cinder blocks and boards if you live in a region that is at risk from strong earthquakes or storms accompanied by high velocity wind. For optimal safety, residents in these areas of the country should opt for solid bookshelves that can be anchored or strapped firmly to the wall studs.
-
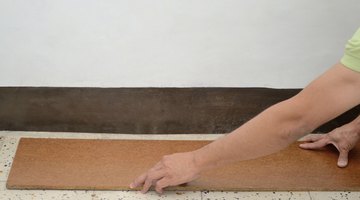
Cut your boards to the length you prefer for your bookshelf -- typically 4 to 6 feet. Most lumber yards and home center stores will cut boards to your desired length for no charge.
-
Lean one board lengthwise against the wall for positioning.
-
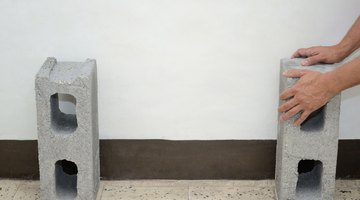
Place two cinder blocks -- which will serve as the base for your bookshelves -- on the floor loosely against the board horizontally, with the long side of each block parallel to the board. These should be positioned so the outer edge of each block is inset one foot from the edge of the board.
-
Slide the board into place on top of the first two cinder blocks.
-
Position two cinder blocks on top of the board, centered over the first two blocks. These cinder blocks should stand vertically with the holes facing forward, allowing extra room for storage.
-
Lay the board over the two cinder blocks.
-
Lift the final two cinder blocks into place on top of the board, and lay the final board into place on top of them -- resulting in a 45-inch tall bookshelf.
-
Fill the new bookcase with books, CDs, DVDs and miscellaneous knickknacks.


The Drip Cap
- A bookshelf constructed of cinder blocks and boards provides practical and economical storage for your magazines, books, CDs and vinyl records.
- You can finish up the room's decor with an eclectic mix of hand-me-down heirlooms and thrift-shop bargains.
- Place two cinder blocks -- which will serve as the base for your bookshelves -- on the floor loosely against the board horizontally, with the long side of each block parallel to the board.
- Slide the board into place on top of the first two cinder blocks.
References
Writer Bio
Mike Matthews is editor of Green Building Product News, a national publication that covers sustainable innovations in building and remodeling, and he has spoken at national conferences on green building. He has also served as founding editor of "Paint Dealer" magazine.
Photo Credits
- roy cataño/Demand Media
- roy cataño/Demand Media
- roy cataño/Demand Media
- roy cataño/Demand Media
- roy cataño/Demand Media
- roy cataño/Demand Media
- roy cataño/Demand Media
- roy cataño/Demand Media
- roy cataño/Demand Media
- roy cataño/Demand Media
More Articles