Things You'll Need
Drawing materials
Cardboard or foamboard
PVA glue
Craft knife
Masking tape
Plastic tiles or pasta
Wooden dowels
Sand
Acrylic paints and brushes
Model scenery foliage
Miniature figurines
Roman homes came in many shapes and sizes. Large cities contained dense neighborhoods of apartment blocks, called insulae, while many villages in the provinces contained simple thatch-roofed houses in the style of the local tribes. Country estates contained large homes called villas. Despite these differences, many Roman houses shared common architectural features, whether they were in the city or the country. Building a model of a Roman house is a great way to learn more about daily life in the Roman world.
Step 1
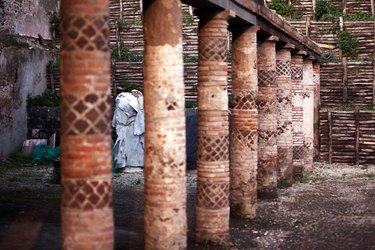
Draw a floorplan for your house. Many Roman homes contained one or more courtyards, with individual rooms opening onto them. Outer walls were often high and plain, with only one entrance leading into the outer courtyard or atrium. Small rooms led off this courtyard, which often had a fountain or pool for catching rainwater in its center. The inner courtyard, or peristylium, was lined with rows of columns. Use historical villa floorplans, or draw your own.
Video of the Day
Step 2
Draw your floorplan onto a base -- a square or rectangular piece of foamboard or heavy cardboard. If you are using cardboard, you may want to glue two thicknesses together, with the corrugations at right angles. This will increase stability and prevent warping.
Step 3
Cut your villa's walls, both internal and external, out of foamboard or heavy cardboard using a craft knife. Then cut out the doors. Depending on the plan you are following, the exterior walls are likely to be higher than the interior walls. Many Roman houses had roofs which sloped down from the outer edge to openings over the atrium and peristylium.
Step 4
Glue the wall sections to the base and to each other using PVA glue. You may want to use masking tape to hold the sections in place while they dry.
Step 5
Add a roof to your house. The roofing sections should slope down toward the center of the courtyards. Where the sections join, there should be gutters that lead down to channel rainwater into the house's water supply. You can get plastic sheets with a tiled texture at hobby or craft stores, or cut tubular pasta in half to make individual tiles. Glue these in place with PVA glue. You may want to assemble the roof but leave it unattached for now, making it easier to paint the walls and courtyards later. The roof of the peristylium should extend into the courtyard itself, supported by rows of pillars made from wooden dowels.
Step 6
Decorate the atrium and peristylium. For a simple rectangular cistern, cut four thin strips of foamboard and glue them into a box shape. Glue this to the floor of the atrium. Add model foliage to the peristylium to give it a garden-like appearance.
Step 7
Paint your house. The walls and columns should be white or off-white, and the roof a brownish red. Paint the interior of the cistern blue, then add a layer of PVA glue to give it a glossy, wet appearance. The lower level of exterior walls in Roman houses was sometimes also painted red. If you're up for even more of a challenge, paint images of plants or birds on the walls of the gardens. This type of decoration was common in Roman houses.
Warning
Always be careful when using a craft knife. Cut on a safe surface, and make all cuts away from your body.
Video of the Day