Things You'll Need
Thread or yarn of your choice
Crochet hook
Irish crochet is a raised motif connected by crocheted bars or loops and picots. It was traditionally worked with fine lace thread and a tiny steel crochet hook in the 19th century. Modern day Irish crochet is worked with larger thread ranging from tatting thread for table cloths, to bedspread cotton for bedspreads and worsted weight wool for blankets, but the technique remains the same. The rose is the most popular of the Irish crochet motifs.
Step 1
Chain 5 and slip stitch in the first chain to form a circle.
Video of the Day
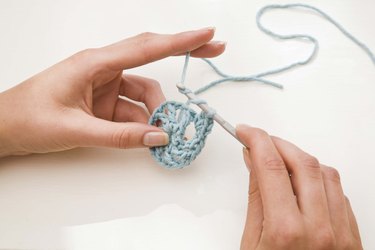
Step 2
Chain 3. Double crochet 9 times in the circle and slip stitch in the third chain at the beginning of the round.
Step 3
Chain 4, skip one double crochet, single crochet in the next double crochet, chain 3, skip one double crochet, single crochet in the next double crochet, three times. Chain 3, join with a slip stitch in the first chain.
Step 4
Slip stitch into the first chain 3 loop. Chain 1, single crochet, half double crochet, 3 double crochet, half double crochet, single crochet in each loop around. Join with a slip stitch in the chain 1.
Step 5
Chain 1, single crochet around the bar of the single crochet in round 3,working from the back. Chain 3, single crochet around the bar of the single crochet in round 3. Repeat around. Slip stitch in the chain 1.
Step 6
Slip stitch into the first loop. Chain 1, single crochet, half double crochet, 7 double crochet, half double crochet, single crochet in each loop around. Join with a slip stitch in the chain 1.
Step 7
Tie off and weave in tails. Attach to a pin back or sew to a garment.
Tip
Make the rose bigger by adding more layers of petals. Increase the number of chain stitches and double crochets in each layer.
Use a crochet hook that will give you a tight stitch.
Keep threat taut and the stitches even throughout.
Video of the Day