Things You'll Need
10 yards tulle
2 yards lining fabric
Flexible tape measure
Straightedge
1/2 yard interfacing
7-inch zipper
Graph paper
Fabric measuring tape
Dental floss
Sewing machine (For this tutorial, a size 70 needle was used with about a 2.5 stitch length)

When making your own custom-fitted tulle skirt, you'll need a bit of time, effort and some sewing know how. But trust us -- it will be well worth it. It's a perfect choice when attending a wedding, prom or any festive soiree.
Step 1
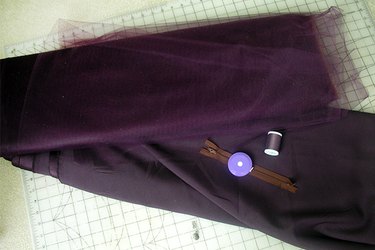
Select your fabric. Choose a fine-gauge tulle for a softer look, heavier gauge for more volume. For the lining, choose a color similar to the tulle for a traditional look, or use a complementary color for more drama.
Video of the Day
Step 2
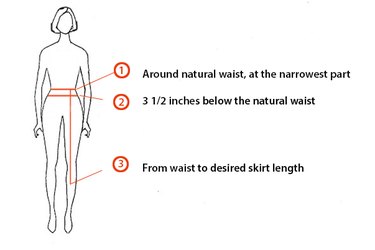
Take measurements. Using a fabric tape measure, take these measurements:
- Waist (natural waistline)
- 3 1/2 inches below the waist (drop-waist)
- Desired length of skirt
For this example, the skirt is about a size 8. The waist measurement is 28 inches, the drop-waist measurement is 36 inches, and a finished skirt length is 33 1/2 inches. However this tutorial will help you create a skirt that is custom fitted to you.
Step 3
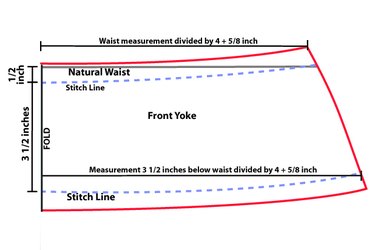
Calculate pattern measurements for the front yoke.
Natural waist: Divide your waist measurement by four, and add a seam allowance of 5/8 inch. Example: 28 / 4 + 5/8 = 7 5/8.
Drop-waist: Divide the drop-waist measurement by four, and add a seam allowance of 5/8 inch. Example: 36 / 4 + 5/8 = 9 5/8.
Draw a pattern for the front yoke: On a piece of graph paper, draw a straight line for the natural waist. Place your pencil 1/2 inch below the left edge of the waist line. Draw a second line tapering up from this point to the right-hand end point of the natural waist line (blue dashed line on the drawing). Draw the upper-cutting line 5/8 inch above, for a seam allowance (red lines on the drawing).
To create the lower edge of the yoke pattern, measure down 3 1/2 inches from the start of the natural waist line, and draw a line the same length as the mid-waist measurement. Starting 1/2 inch below the drop-waist, draw a line tapering up from this point to the end point of the drop-waist measurement (blue dashed line on the drawing). Finally, draw a lower cutting line 5/8-inch below this line (red line on the drawing).
Draw a vertical line connecting the left side of the upper and lower cutting lines. (The black fold line in the drawing.) Draw a tapering cutting line on the right side connecting the upper and lower cutting lines (red lines on the drawing).
Step 4
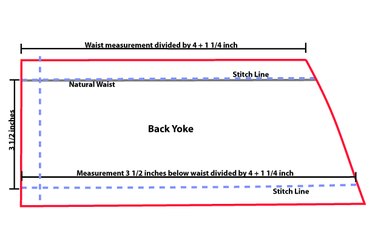
Calculate the pattern measurements for the back yoke.
Natural waist: Divide the waist measurement by four and add seam allowances of 1 1/4 inches. Example 28 / 4 + 1 1/4 = 8 1/4
Drop-waist: Divide the drop-waist measurements by four and add a seam alliance of 1 1/4 inches. Example 36 / 4 + 1 1/4 = 10 1/4
Draw a pattern for the back yoke: On a piece of graph paper, draw a straight line for the natural waist. Draw the upper cutting line 5/8 inch above, to create the seam allowance (the red line in the drawing).
To create the lower edge of the yoke pattern, measure down 3 1/2 inches from the start of the natural waistline and draw a line the same length as the drop-waist measurement. (The blue dashed line in the drawing.) Draw a lower cutting line 5/8 inch below this line (the red line in the drawing).
Draw a vertical line connecting the left side of the upper and lower cutting lines. (The red line.) Draw a tapering cutting line on the right side connecting the upper and lower cutting lines (red line).
Step 5
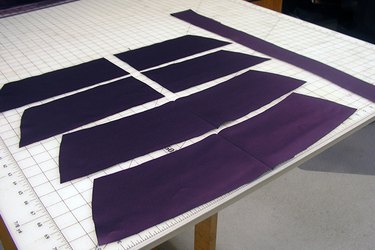
Cut out the front and back yokes, yoke lining and the waistband.
1. With the lining fabric folded along the straight grain of the fabric and the left side of the front yoke pattern placed on the fold, cut two front yokes. One will be the yoke and one will be a yoke lining.
2. Cut four back yoke pieces -- two yoke backs and two yoke linings.
3. Cut a waistband 3 inches wide by the waist measurement + 3 inches (3 by 31 inches in the example).
Step 6
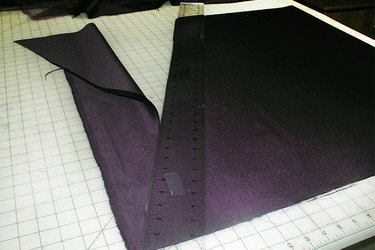
Cut out the skirt lining.
1. Subtract 3 1/2 inches from the finished skirt length to determine the length of the skirt lining (30 inches, following the example).
2. With the fabric doubled and along the fold of the fabric, cut two pieces this length.
3. Mark a point at 1/2 the waist measurement (14 inches) from the folded edge of the fabric.
4. Place a straightedge from this point at an angle to the end point of the skirt, and cut along this line for each piece.
Step 7
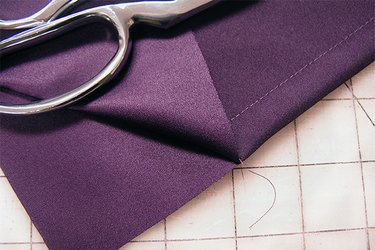
Stitch the skirt lining.
1. With right sides together, stitch the side seams together using a 5/8-inch seam allowance.
2. Along the fold of one center back, create a zipper opening by stitching a 5/8-inch seam, stopping 3 inches from the waist edge. Make a 90-degree turn and stitch to the fold. Cut through the fold down to the stitch line.
3. Make a 90-degree turn and stitch to the fold.
4. Cut through the fold down to the stitch line.
5. Zigzag or serge the edges and each side of this zipper opening.
Step 8
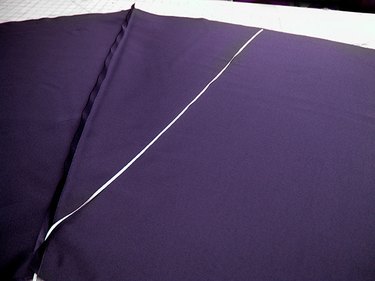
Create the curve of the hem.
1. Fold the skirt lining with side seams together in the center and the front and back centers on the sides.
2. Pin a length of ribbon or other string to the center of the waistline.
3. Pull the ribbon taut and swing it in a curve, finding the narrowest point. Cut the ribbon to this length.
4. Move the ribbon across the fabric, using it as a guide to mark an arc across the point of the side seams.
5. Cut this arc through both layers of the skirt. Note: This process makes the skirt hang straight rather than drooping on the sides.
6. Hem the skirt lining with a narrow hem.
Step 9
Cut and gather the tulle.
1. Subtract 2 1/2 inches from the finished skirt length for the first layer of tulle (31 inches in the example).
2. From the full width of tulle, cut six sections to this length.
3. Subtract 3 1/2 inches from the finished skirt length to find the length for the second tulle layer (30 inches in the example).
4. From the full width of the tulle, cut six sections to this length.
Add the dental floss.
1. Cut a piece of dental floss about one and a half times the waist measurement.
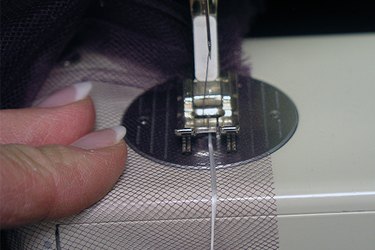
2. Lay the floss 1/2 inch from the top edge of the first tulle layer and zigzag stitch over the floss, connecting six sections of the same length together overlapping them by about 1/4 inch.
3. Gather the tulle slightly along the floss by pulling it as you stitch. Be careful to stitch over the edges of the dental floss, not into it. You use the floss to gather the tulle.
4. Cut a second piece of the dental floss and zigzag stitch over it to connect the six pieces of the second tulle layer.
Step 10
Assemble the yoke.
1. With right sides together and using a 5/8-inch seam allowance, stitch one back yoke piece to each side of one front yoke piece.
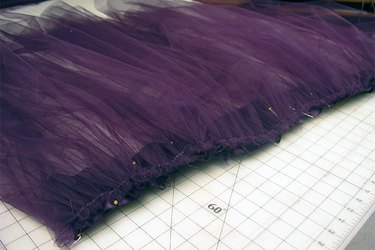
2. On the first tulle layer, the longest layer, pull the dental floss as a gathering thread, and pin the tulle to this yoke assembly, right sides together, evenly spacing the gathers.
3. Stop the gathers with a 5/8-inch seam allowance on each end.
Stitch the first layer of tulle to the yoke assembly with a 5/8-inch seam allowance. Remove the dental floss by pulling it out. This is surprisingly easy. Gather the second layer in the same manner, and stitch it down with a 1/2-inch seam allowance. Remove the dental floss from this layer.
Step 11

Add the lining.
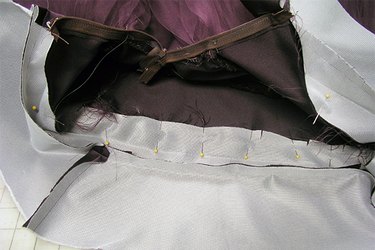
1. Gather the skirt lining, using the dental floss method, and pin it to the yoke assembly.
2. Fold back the 5/8-inch seam allowances on each side of the yoke, and match it to the zipper opening of the lining.
Step 12
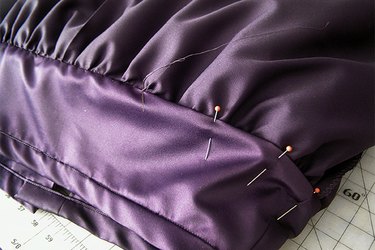
Put in the zipper.
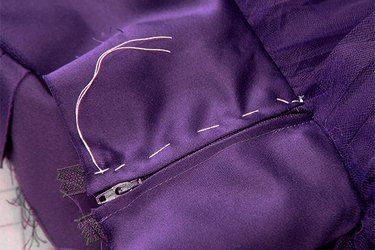
1. Fold the gathered skirt seam up toward the waist, pin and stitch one side of the zipper in place.
2. Pull the tulle to the side, and do not sew through it.
3. Hand-baste the opposite side of the zipper in place using a contrasting color so that it will be easy to remove.
4. Machine stitch.
5. Stop and restart the stitching at the seam and avoid catching the tulle in the zipper.
6. Remove the basting stitches.
Step 13
Assemble the yoke lining.
1. Cut and fuse interfacing to the waistband, front and back yoke lining pieces.
2. Sew one yoke back lining to each side of the yoke front lining.
3. Press the waistband in half, wrong sides together.
4. Stitch the waistband to the yoke lining assembly.
Step 14

Attach the yoke lining to the yoke.
1. Pin and sew the waistband to the skirt yoke, right sides together.
2. Fold the yoke lining to the inside, and topstitch along the waistband seam.
Step 15
Add the finishing touches.
1. Fold a seam allowance under, and stitch down the yoke lining to the seam.
2. Tack the lining in place at the zipper, and attach a hook closure.
3. Add a small ribbon at the waist if desired.
Video of the Day