Unlike plain white letter stock, watercolor paper has a textured surface that is better suited to absorb water-based paints and inks. Using the Sandstone texture in Photoshop CC 2014, you can make any white background look like watercolor paper. If you plan to paint on the paper in Photoshop, modify the Brush Tool settings to make your artwork look like it was drawn on real watercolor paper.
Making Watercolor Paper
Video of the Day
Step 1
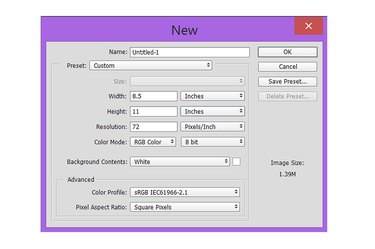
Launch Photoshop and press "Ctrl-N" to create a new file. Set the size to whatever you need. If you're going to print your work on letter-sized paper, select "8.5" inches as the width and "11" inches as the height. Use the default settings, including a "White" background for this project. Click "OK" to open the file.
Video of the Day
Step 2
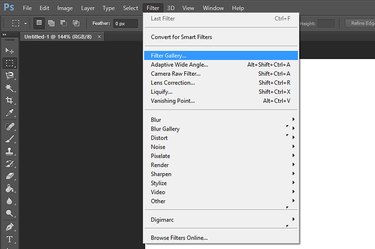
Click the "Filter" menu and select "Filter Gallery." This is where the Texture filters are found.
Step 3
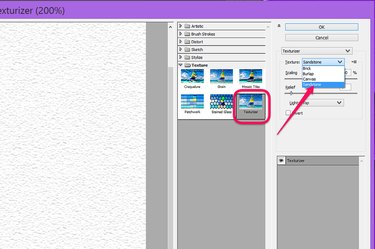
Click the "Texture" folder to expand its contents and select "Texturizer." In the Texture menu on the right, select "Sandstone."
Step 4

Drag the "Scaling" and "Relief" sliders as desired to create a watercolor paper effect. Scaling controls the size of the pattern, while Relief controls its density. If you're using an 8.5-by-11-inch document, set the "Scaling" level at "76" percent and the Relief level at "3." Click "OK." Save the document when you have the effect you want so you can use it in future projects.
Painting on Watercolor Paper
Step 1
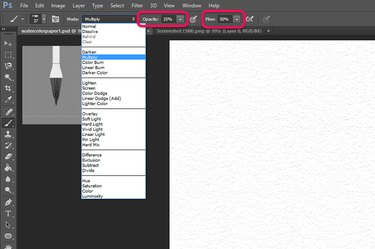
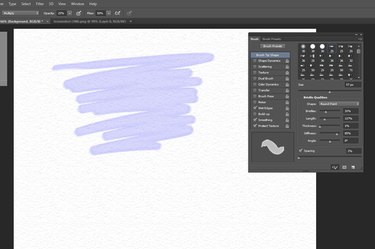
Use a watercolor brush on the watercolor-textured paper. Select the "Brush Tool" from the Photoshop Toolbox. Click the "Mode" menu in the Options bar and set this to "Multiply." This mode adds color when you paint on the paper without obliterating the paper's texture. Set the Opacity at "25" percent and the Flow at "50" percent to mimic the semitransparent flow of watercolor paints on textured paper.
Step 2

Open the "Brush" window from the Window menu. Select the "Round Point" option in the Shape menu and click the "Wet Edges," "Smoothing" and "Protect Texture" check boxes. When you drag the brush across the textured paper, it should resemble the effect you get from using watercolors.
Step 3
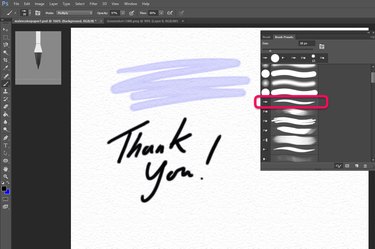
Experiment with other brush settings. To use an ink brush on watercolor paper, for example, select "Black" for the "Foreground Color" in the Toolbox. Increase the Opacity in the Options bar to about "95" percent and the Flow to about "85" percent. Click the "Brush Presets" tab in the Brush window and select a round pointed brush. Adjust the settings as desired and try different presets to see how they work on the textured paper.