It's possible to replace kitchen tiles on the floor or wall without removing cabinets, even if they're built on top of old tiles. The trick is cutting the tile around the cabinets using the proper tools. However, this be a difficult, labor-intensive and time-consuming process.
Before undertaking this project, you have to check the status of the subfloor. If there are no signs of water damage, you can proceed with the job. However, you'd be better off pulling the cabinets all the way off if there are problems.
Video of the Day
Video of the Day
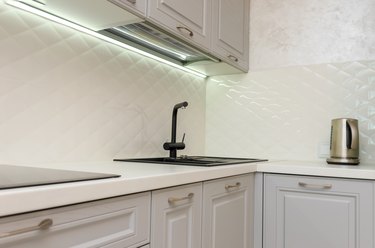
Removing Tiles Around Kitchen Cabinets
To replace kitchen tiles on the floor or wall without removing the cabinets, begin by clearing out the unnecessary items in the kitchen. Cover any vents and remove the moldings using a pry bar.
Next, put masking tape on the edges of the cabinets to protect them from damage. With safety goggles and gloves on, carefully begin cutting the tile around the cabinets using a rotary power tool or toe-kick saw with a masonry cutting disk. The latter works best when working with tiles on the floor and isn't a practical option for removing tiles from a wall.
After you've cut the tiles, remove any broken-off pieces that are still glued to the surface of the floor or wall with a chisel and hammer. You should see the wall or subfloor when you've successfully cleared everything out.
Adding New Tiles
Next, prepare the wall or floor's surface for retiling. Vacuum up dust and debris with a shop vac. Try to get the surface as smooth and level as possible by using a leveling compound on the floor. For walls, fill in low areas with spackling and sand down high points of leftover grout with a coarse sanding sponge.
Always work on a small area at a time when you're tiling so that everything is done to perfection. Wait at least 24 hours for the tiles' adhesive to dry before applying the grout and another 24 hours to apply the grout seal. Remember to leave at least a quarter-inch of space around the cabinet edges when you lay down the tiles since you still have to put grout in between.
Replacing Tile With Hardwood
If you're not planning to install new tiles in your kitchen but would instead like to lay a hardwood floor, the process for removing existing tiles is the same. The biggest advantage of having hardwood floors over tiles is aesthetics. This material is more comfortable to walk on than tiles and it won't collect allergens and molds.
Tiles are more durable and water-resistant, however. They're also easy to clean, especially when you cook a lot in the kitchen and spills and drips are common. Hardwood floor is more prone to water damage and requires re-polishing every three years or so.
Replacing Linoleum With Tile
It's easier to replace a linoleum kitchen floor with tiles. You can pry the pieces off with a floor scraper and gloved hands. Whether you have plywood or concrete subfloors underneath, you must patch the cracks and holes properly before tiling to even out the surface.
In some cases, it's possible to put new tiles on the floor without removing the linoleum. However, this is only recommended if the subfloor is in great condition.