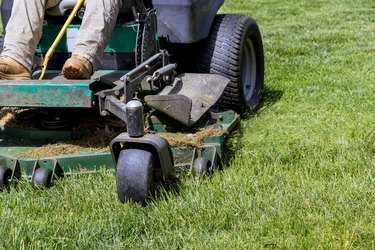
The John Deere LT133 was only produced from 1998 to 2001, but despite its relatively short production run and its place as a lower-end model in the LT-Series, the ride-on lawn mower is beloved and still sought after by many. The LT133 is light at roughly 400 pounds, with a 38-inch adjustable mower deck and a single cylinder, 13 horsepower Kohler engine. It was designed with its operator's comfort in mind. If your LT133's steering shaft is malfunctioning, replacement parts can still be purchased online. And though it may be too difficult for those without prior experience, accessing and replacing the steering shaft is relatively simple if you have some mechanical skill.
Finding the Shaft
Video of the Day
The LT133's steering shaft is the metal shaft set between the mower's steering wheel and steering gear. Although it is unlikely that OEM replacement shafts can be found today, aftermarket repair kits for the LT133 can be purchased online easily. When shopping online for replacements, be sure that your repair kit is compatible with your model of lawnmower. If you have access to the user or maintenance manual, you may be able to find the exact part number you need when making comparisons.
Video of the Day
Getting Started
When you've obtained your replacement kit and you're ready to begin the replacement process, raise the front of your LT133 with a floor jack. Place jack stands beneath the chassis rails on either side of the lawn mower to the rear of the front tires. Lower the mower onto the jack stands carefully, then make sure that the mower is secure. If possible, have a friend or assistant present in case of an emergency. Lie beneath the front of the mower, sliding yourself into a position where you can access the steering gear, which is the metal, fan-shaped object at the lower end of the steering shaft. Loosen the steering gear's mounting nuts with a ratchet and socket and a flat-head screwdriver. This will allow the gear to fall away from the steering shaft without disrupting the shaft removal itself.
Gripping the Shaft
Once the steering gear has been dismounted, return from under the machine and tilt the hood of the LT133 forward over the front of the mower. Locate the nut and bolt at the top of the steering shaft, then remove it with a ratchet and socket as well as an open-end wrench. Push the bolt through the steering shaft, then remove the steering wheel from the shaft. Pry up the wheel's bushing from the top of the mower's dashboard using a flat-head screwdriver, then use pliers to remove the cotter pin in the middle of the shaft. This will allow you to pull the steering shaft up and completely out of the lawnmower.
Replacing the Shaft
With the original steering shaft retrieved, you may now set the replacement shaft into place from the top down, allowing the shaft to fall slightly below the dash. Reverse the previous steps to secure it. Insert a bushing into the shaft, pulling the shaft back up and against the bottom of the dash. Insert the second bushing, then insert a washer between the upper bushing and the steering wheel, installing the steering wheel onto the shaft afterwards. Set the wheel's bolt in place, turning the wheel to a neutral position. You may need to adjust the front wheels manually so that they face straight forward.
Finishing Up
Close the hood of the mower, then return below the machine to access the steering gear as you did previously. Hold the steering shaft with one hand to keep it from turning, then press the gear upward to lock it into place with the steering wheel. Tighten the nuts on the steering gear's housing by hand to set it in place temporarily, tightening the gear nuts with a ratchet and socket and a flat-head screwdriver. Turn the nuts until snug, adding one additional half-turn. Check the alignment of the steering wheel and the front wheels, adjusting as necessary. When everything seems correct, insert the cotter pin into the center of the steering shaft, then tighten the locking nut. Finally, lower the mower off of the jack stands – you should now be ready to return to the field!