
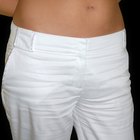
Regardless of your size or shopping history, it can be incredibly frustrating when you go to a store to try on pants or shorts and nothing fits right. Sizes are not always correct or consistent from brand to brand, and the prices can be quite high. Making your own pants or shorts is a sure way to get garments that fit for a price you can afford. Start with a pair of elastic waist or drawstring pants or shorts that are your size. They do not have fit perfectly, as long as you can get then on. You will use these to make the pattern for your new pants or shorts.
Creating a Pattern
Fold the pattern pants in half lengthwise, so it looks like there is only one leg. Extend the crotch and the waist all the way out. Place the pants flat on the freezer paper or wrapping paper.
Trace around the pants using the pencil. Remove the pants from the paper.
Draw lines 1/2 inch from the side, center crotch, and the inner leg trace lines. Draw a line 1 inch from the waistline and bottom of the leg, for seam allowance.
Make adjustments to the pattern. If the pants are a little tight around the waist, extend the waistline out 1 or 2 inches, making sure that you add the same amount to the outside seam line. If the pant legs are too long, draw a line across the pattern leg a few inches higher, leaving 1 inch extra for hemming. If the pants are too tight in the crotch, curve the crotch line a little deeper. Adjust as needed for you, and try the pattern pants on again if you are having trouble remembering their fit.
Cut the pattern from the paper along the lines you drew.
Fold the fabric in half, with right sides facing each other. Pin the pattern to the fabric and cut around the pattern. Remove the pattern, leaving the two layers of fabric pinned together. Repeat this one more time with another section of fabric. In the end, you should have two double-layered pant legs to work with.
Sewing the Garment
Using a sewing machine, sew a single seam up one of the pant legs. Start at the tip of the crotch and move towards the bottom of the pant leg, 1/2 inch from the edge. This is the inner leg seam. Repeat the same process on the other pant leg.
Open up both of the pant legs. Place the right side of one pant leg on top of the right side of other pant leg. Match up the outer edges, the inner leg seam, and the center crotch seam. Pin the material together to hold it in place.
Sew the center crotch seams together, the part that looks like a “U,” 1/2 inch from the edges.
Reposition the pants so that the right side of the front of the pants is facing the right side of the back of the pants. Pin, then sew from the waist to the hem on both pant legs. This forms the outer side seam.
Fold the bottom edge of both pants legs over 1/4 inch, then fold over another 3/4 inch, with the wrong side facing each other. Pin to hold, then sew the fold in place.
Sew two 1/2-inch buttonholes in the front of the pants, 1 1/4-inch from the top and 1-inch from the center seam on both sides. Cut the button holes open carefully, either using your machine's button hole foot or tackling the task by hand, with scissors and thick thread.
Fold the top edge of the pants over 1/4 inch, then fold over another 3/4 inch, with the wrong side facing each other. Sew the fold down as close to the lower edge as possible, forming a casing for the drawstring.
Measure yourself around your waist and cut the drawstring at your waist measurement plus 24 inches, for tying. Attach a safety pin to the drawstring. Insert the safety pin into one buttonhole and around the casing in the top of the pants. Once the safety pin is out the other buttonhole, remove it, and adjust the tension on your drawstring.
Related Articles
How to Put an Elastic Band in Pajama ...

How to Narrow Wide Pants

How to Add Elastic to the Ends of Pants ...

How to Sew a Dart Into Jeans
How to Alter the Waist of Pants to Make ...
How to Make a Satchel
How to Modify Yoga Pants
How to Alter Pajama Bottoms

How to Lengthen Dress Coat Sleeves

How to Fix Jogging Pants With Saggy ...
How to Adjust the Elastic in a Jacket

How to Make Suit Pants That Are Too ...

How to Fix a Fraying Cuff on a Work ...
How to Fix a Snag In Cotton Pants

How to Alter Pants to Make Them Smaller ...
How to Make Tear Away Pants
How to Make Wrap-Around Moccasin Boots

How to Lengthen a Suit Jacket
How to Lengthen Dress Pants
How to Remove a Double Crease
References
- Sewing.org: Easy Waistband Casings -- Elastic and Drawstrings
- “Designing Apparel through the Flat Pattern”; Ernestine Kopp; 1960
- “Guide to Fashion Sewing”; Connie Amaden-Crawford; 1986
Writer Bio
Nicolle Gunay worked in the fashion industry for several years before becoming a teacher. She has an Associate of Science in fashion design and a Bachelor of Arts in theater from Florida Atlantic University.
Photo Credits
Polka Dot Images/Polka Dot/Getty Images