Things You'll Need
Double-sided adhesive paper
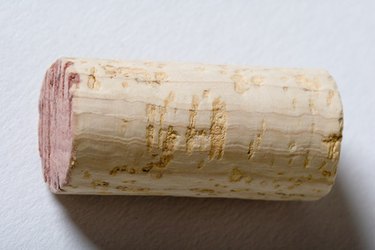
Wine corks
Knife
Cork tiling is a natural product that is popular as a wall covering and flooring material. Often cork tiles are made from recycled cork wine bottle stoppers and other scraps, which makes it a green product. Instead of throwing your used wine corks away, make your own cork tiles out of them. Recycling wine corks in this way eliminates landfill waste and adds a stylish touch to your home décor.
Step 1
Allow collected wine corks to dry completely, or purchase new corks from a winemaker's supply store. For each tile that measures 11 ½ inches square, you will need about 15 standard wine corks.
Video of the Day
Step 2
Cut each cork crosswise into ¼-inch disks using a very sharp knife. You should get seven disks from a standard cork. Very dry corks may crumble in places, but do not worry about holes or gaps in the disk. Cut each disk the same thickness to provide a level tile.
Step 3
Cut sheets of double-sided adhesive paper to the size that you want your finished tiles to be. Cut as many sheets as necessary to make all the tiles you desire. Plan an overall design and make the tiles any size or shape you please.
Step 4
Peel the protective paper from one side of one sheet of the double-sided adhesive paper. Place it on a flat, level surface. Leave a ¼-inch border around all edges of the paper and begin placing cork disks on the paper in even rows, or any design you choose. Leave ¼-inch gaps between each disk. Press each disk down firmly with your fingers to make it stick in place.
Step 5
Continue placing cork disks on the adhesive sheet until it is covered. Repeat Step 4 for each adhesive sheet you cut until you have all the cork tiles you want.
Tip
You can use the tiles on walls or floors. Peel the protective paper from the back of the tile to expose the adhesive on the back. Press the tile in place where you want it. Overlap the ¼-inch edge on the first tile with that of the next tile, leaving only ¼ inch between the last row of disks on the first tile and the first row on the second tile. After you have positioned all the tiles in this way, fill in the spaces between the cork disks with grout. After the grout is dry, seal the tiles with polyurethane.
Dye the cork disks with food coloring to make colorful designs.
Use champagne corks to get disks of a larger diameter.
Video of the Day