Is it possible to stain over paint if you want to freshen up the look of your old furniture? Yes, you can stain over paint — and you can use water- or oil-based, liquid, or gel stains to make an antique glaze, darken an existing color, or fill in color on old painted furniture as an alternative to repainting. Preparing the surface well and sealing it when you're finished creates the best results.
What Stain to Use
Video of the Day
The best stain type depends on the project and the look you want to achieve. If you're glazing or antiquing, you may prefer a gel stain, which acts more like a glaze than a liquid stain does. Choose a water-based stain — it adheres better to painted surfaces than oil-based stains, which excel at penetration. A liquid stain may be a better choice when patching up a faded or peeling paint job, and for this job, an oil-based product is probably the better choice. It sinks deeply into exposed bare wood while being easier to remove from painted surfaces.
Video of the Day
Things You'll Need
Detergent
Gloves
Stain
Rags
Clear finish
How to Stain Over Paint
Step 1: Clean the Surface
Clean the surface thoroughly with detergent and water. A strong detergent, such as trisodium phosphate, will ensure that no greasy or waxy spots remain to repel the stain. Mix a solution consisting of 1/2 cup per gallon of water. Protect yourself from its corrosive properties by wearing gloves and goggles while washing the surface with it, using a sponge or rag.
Step 2: Remove Flaking Paint
Scrape or sand off flaking, peeling, or otherwise damaged paint if the piece has any blemishes. If you stain over the blemished paint areas, it will continue to flake and the finish won't last. If you have to remove a large portion of the paint to get a smooth surface, the stained finish will look inconsistent. You'll either need to paint over the area you removed or get rid of all the paint and stain the bare wood.
Step 3: Scuff With Sandpaper
Whether you wash with a mild detergent or with TSP, which is strong enough to etch the paint, you should scuff those parts of the painted surface to which you want the stain to adhere using 150-grit sandpaper. You don't need a machine to do this — hand-sanding is sufficient.
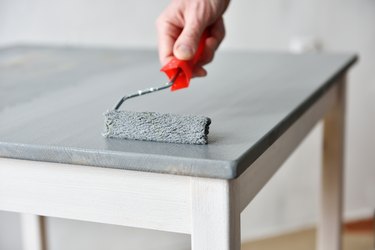
Step 4: Apply the Stain
Spread the stain generously on the painted surface with a brush or rag, working it carefully into crevices and around molding. This is especially important if you're after an antiqued look. Instead of applying it in a circular motion, use straight swipes with the rag when you apply the stain.
Step 5: Wipe It Off
The quality of a paint job depends on how well you spread the paint, but when staining over paint, the quality of the job depends on how you remove the stain. Wipe hard enough to remove any stain that remains on the surface or you'll see streaks. If you prepared the surface well enough, the stain will settle in the pores you created in the paint. You don't want to wipe too thoroughly, or you'll remove all the stain you applied.
Step 6: Do It Again
You may not get the effect you're after with one application of stain. If not, add more after waiting for the first coat to dry.
Step 7: Apply a Clear Finish
Unlike paint, stain has no binder — it's all pigment and solvents — so you have to protect the surface with a clear coat. Polyurethane, acrylic, water-based lacquer, and solvent-based lacquer are all appropriate finishes. Most should adhere well since you've already etched and scuffed the surface.
Warning
Seek professional help if the surface of your project was painted before 1978. Lead paint was used in homes before that year and can present a health hazard.