A great way to learn more about the moon is to make a model to help explain its movement, surface and location in comparison to Earth. One easy way to make a model of the moon is to use a Styrofoam ball and add elements to it that make it resemble the moon's surface.
Supplies
Video of the Day
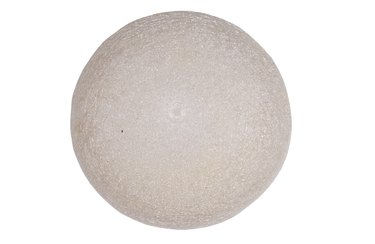
Purchase a Styrofoam ball from a craft store. These stores sell a variety of sizes of Styrofoam balls, so you can choose the size that best fits your needs. If you are making your model for classroom purposes, you may want to use a larger model so everyone can see the model clearly. You will also need 2 shades of gray or slate colored paint, one dark gray and one light gray. Use spray paint if you have a well-ventilated area you can work in, or use craft paint and a paintbrush. In addition, have a sharp knife on hand and a black permanent marker.
Video of the Day
Process
Paint the Styrofoam ball completely with gray paint. Because the Styrofoam has a natural inconsistent texture, it works perfectly to portray the surface of the moon. After the gray paint is applied, the dents and holes in the foam will resemble the moon's surface as seen from earth. Now you must tweak the surface of the foam ball to look like the moon's terrain. Paint the dark areas on the moon called maria. Use the knife to cut out craters, using a spoon or spatula to dig them out. Use a picture of the moon as a guide to see what they should look like. Use the permanent marker to make other markings to represent other features the moon's terrain or to label the maria and crater names or even the Apollo landing sites.