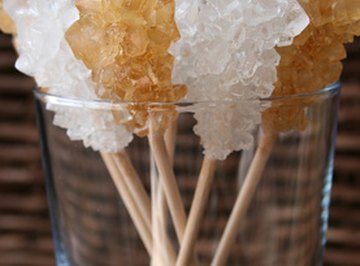
Rock candy is a delicious treat which can teach students about the science principle of how crystals form. Rock candy projects take about 10 days from start to finish, and can be done either in class or as a take-home assignment where students observe the project at home. Conclude the project by allowing students to show-off their individual projects and enjoy their hard work.
Explanation

According to Exploratorium, crystals can form in two ways—precipitation or evaporation. Supersaturated sugar solutions contain more sugar than liquid. As the solution cools the sugar forms on the string and precipitates, attaching to the string.
Evaporation occurs over time when the water leaves the solution. In this method the rock candy crystals grow molecule by molecule. According to Exploratorium, after the crystals have grown for a week there will be about a quadrillion crystal molecules attached to the string.
Experiment
For each rock candy specimen you will need two cups of boiling water and four cups of sugar. While on medium heat, stir in the sugar until it has completely dissolved and returned to a rolling boil. Remove the saucepan from the heat and pour the sugar mixture into a glass jar. Cut a piece of cotton string about the size of the glass jar; tie a washer to one end and a pencil to the other end. Dip the string into the sugar mixture until fully saturated; set aside on a piece of wax paper for a few days. Cover the jar with a piece of wax paper.
Place the dried string into the sugar mixture, washer side down, the pencil lying across the top of the jar. Within the first few days you should notice crystals forming on the string. Set the jar aside for about a week or until the rock candy is your desired size.
Facts
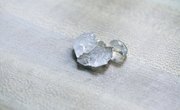
According to Exploratorium, crystals grow quicker in places where a crystal has already formed. As the water evaporates from the dipped string, small sugar crystals, also known as “seed crystals” are left behind on the string. The seed crystals encourage the growth of more crystals, and will continue growing until the string is removed from the sugar solution and rinsed with water.
Expert Insight
According to Baking 911, rock candy can be colored or flavored by adding ¼ teaspoon of food coloring and ¼ teaspoon of oil-based flavoring such as lemon or spearmint to the sugar mixture before it cools. Once cooled do not stir the sugar solution; jarring the solution breaks down the crystals and prevents larger crystals from forming.
Importance
Teach students about the scientific method while conducting this class project. Encourage students to conduct background research on crystal formation and then construct a hypothesis. Perform the experiment and retest with alterations. Allow students to analyze the results and conclude whether or not their hypothesis was correct. Once the project has been completed, allow students to record their results in written projects, display boards or oral reports.
References
About the Author
Daniella Lauren has worked with eHow and various new media sites as a freelance writer since 2009. Her work covers topics in education, business, and home and garden. Daniella holds a Master of Science in elementary education and a Bachelor of Arts in history from Pensacola Christian College.
Photo Credits
Crystals in Glass image by Vanessa van Rensburg from Fotolia.com