Things You'll Need
Glass
Water
Scissors
Tweezers
Paper towels
Scrap paper

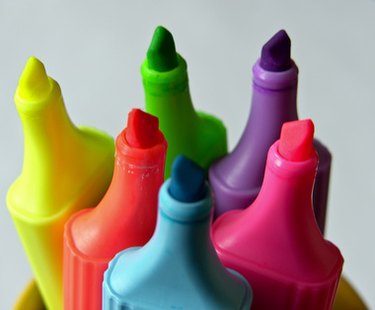
Felt tip pens are used for craft and design projects by adults and children alike. Though felt tip pens produce more brilliant colors than crayons or colored pencils, the felt tips and inside ink rods do have their share of problems. Drying ink and split or uneven felt tip surfaces are repairable conditions that can be fixed, at least temporarily until you can purchase or borrow fresh felt tip pens. Because most felt tip pens are manufactured using the same construction concept, most felt tip pens are easily fixed.
Fixing Dried Ink in a Felt Tip Pen
Step 1
Use tweezers to grasp the end cap on the end of the felt tip pen and pull it from the pen casing. Often felt tip pen end caps are a different color than the pen casing, making it easier to identify. If the cap is stubborn, wiggle the cap back and forth with the tweezers until you are able to pull it from the casing.
Video of the Day
Step 2
Fill a glass with water.
Step 3
Remove the felt rod from the inside of the pen with tweezers. The felt rod contains the colored ink. Place the felt rod into the glass filled with water for approximately 30 seconds to one minute.
Step 4
Remove the felt rod with the tweezers and place it on a paper towel. Dry the outside of the ink rod and reinsert the rod into the pen casing. Replace the felt rod with the tweezers into the pen casing. Replace the end cap onto the end of the pen casing.
Step 5
Dip the felt tip of the pen into the water in the glass for approximately 30 seconds. Test the pen on scrap paper to work out excess water and to get the dried ink flowing again.
Fixing Uneven or Split Felt Tips
Step 1
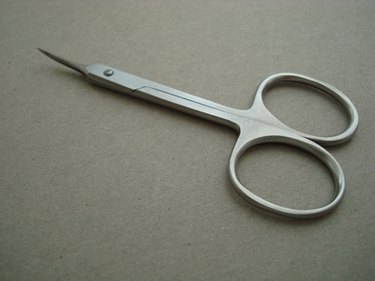
Cut across the felt tip of the pen with scissors to create a new, sharper surface. Nail trimming scissors work best for smaller felt tips. Over time, felt tips become fuzzy and uneven with stray fibers that can blur and mar your work when you are using them.
Step 2
Trim any stray fibers from the felt tip with scissors. Pay close attention to the sides of the felt tip. If your felt tip has split and is in two or more layers, proceed to the next step.
Step 3
Use tweezers to pull out the smaller split section(s) of the felt tip. Trim the remaining piece of felt tip with scissors to remove fuzzy fibers. Removing the split layers of the felt tip will create a narrower felt tip, but will allow you to continue working without the ill effects of a double or divided line caused by the split felt tip.
Tip
Water works best for non-permanent markers and pens. For permanent ones, try dipping the tip of the pen in a bottle cap filled with rubbing alcohol until the ink starts to swirl. Then replace the cap for 15 minutes before using the pen again.
Re-hydration fixes are usually temporary and may only last for a few days. The lower the pen's quality, the shorter the fix will last. After trying this repair several times, it may be easier to simply buy new pens.
Warning
Use caution when fixing permanent ink felt tip pens as the ink, even diluted with water, can cause permanent stains to clothing and household towels.
Video of the Day