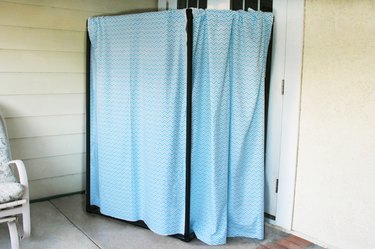
Privacy can be hard to maintain, especially when you have a large family and everyone wants their own space. Build a PVC room divider to create a little privacy in any room or even an outdoor area. Making your own divider is ideal because you can tailor it to look however you want and take whatever shape works best for your space.
Video of the Day
Things You'll Need
1-inch PVC pipe, 40 feet
Pipe cutter
1-inch PVC 90-degree connectors, 4
Clear PVC cement
1-inch PVC 3-way connectors, 4
1-inch PVC 45-degree connectors, 4
Spray paint
8 yards of fabric
Scissors
Fabric marker
Sewing machine
Thread
Buttons, 9
Tip
- Be sure to wash the fabric before cutting it, in case the fabric shrinks.
- The room divider featured in this project is 5-feet tall, 6-feet wide, and has three sections, but you could customize the dimensions according to your preference.
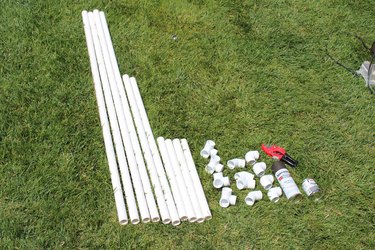
Step 1: Cut the PVC Pipe
Start by cutting the vertical pieces. Cut four pieces of the 1-inch PVC pipe at 5 feet each in length. Now cut four pieces at 18 inches each in length, which will make up the horizontal pieces in the two smaller sections. For the middle section (which is larger), cut two more pieces at 3 feet each in length. Lastly, cut four 2-inch pieces, which will be used to connect the other connectors.
Video of the Day
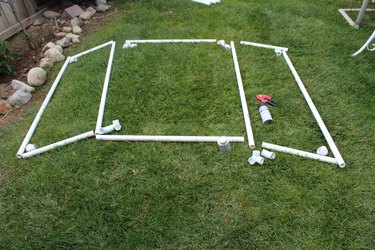
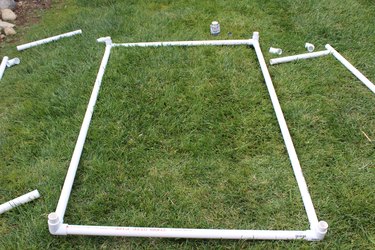
Step 2: Lay Out All the Pieces
Lay out all the pieces on the ground the way they are going to be assembled. Start with the four 5-foot pipes, laying them vertically so they are parallel to each other. Now take the two 3-foot pipes and lay them horizontally in the middle top and bottom so that you have two vertical pipes on each side. Then take the four 18-inch pipes and lay them horizontally at the top and bottom on each side, placing them between the other two vertical pipes. Place the 90-degree angles on the four outside corners. Place the four 3-way connectors on the corners of the middle section as well as the four 45-degree connectors and 2-inch pipes.
Step 3: Build the Middle Section
Build the divider in sections and then assemble, starting with the middle section. Attach one of the 5-foot vertical pipes to a 3-way connector piece with PVC cement. Make sure to push them together as far as they can go. Now attach a 3-foot horizontal pipe to another end of the same 3-way connector piece. Before the glue dries, place these three pieces on a flat surface and make sure they are level and that the last hole is facing up away from the ground. You now have one L-shape for your middle section.
Create another L-shape just like this one, and then attach the two L-shapes together to form a rectangle, using 3-way connector pieces in the remaining two corners. Make sure both vertical pipes are parallel and that all 3-way connectors are facing up.
Tip
Each time you connect a piece of PVC pipe to a 90-degree angle or 3-way connector, you need to apply PVC cement to the inside of the connector/angle and also on the outside of the pipe, about 1/2 inch on both. After connecting each piece, be sure to wipe away any excess glue with a wet paper towel.
Step 4: Create the Two Side Sections
Take a 90-degree PVC connector and attach it to one of the 18-inch horizontal pipes. Now attach a 5-foot vertical pipe to the other side of the 90-degree connector. Attach another 90-degree piece to the other end of the same vertical pipe. Then attach an 18-inch horizontal pipe to the second 90-degree piece. Before the glue dries, make sure to lay the connected pipes flat so they are all level. You have just created one of the two C-shaped side sections; repeat to create the other side section, with the C-shape reversed.
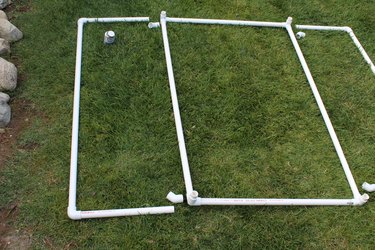
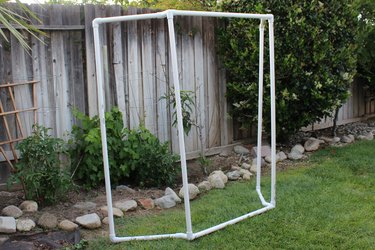
Step 5: Connect the Side Sections
You should have four holes in each corner of your middle section. Attach the four 2-inch PVC pipes into each of these holes. Now take two 45-degree PVC connectors and attach them both to one side of the middle section, making sure they are facing away from the middle section. Before the glue dries, attach one of the side sections to the other ends of the same 45-degree connectors. Do the same thing to attach the other side section to the middle section. You will end up with a three-section piece that can stand up.
Tip
When attaching the connectors, you can place a scrap piece of pipe into the empty end of the connector to better see where the pipe will end up once glued.
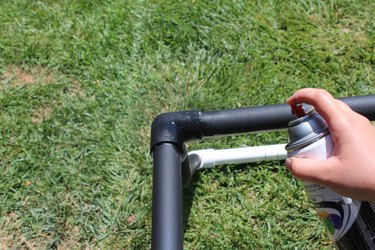
Step 6: Paint the Divider (Optional)
Once the glue has dried on your room divider, spray paint it whatever color you like. Spray several light coats of paint, allowing time to dry between coats, to prevent dripping. Be sure to paint in a well-ventilated area.
Step 7: Cut the Fabric Panels
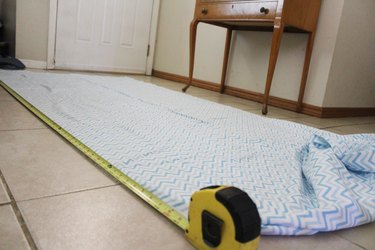
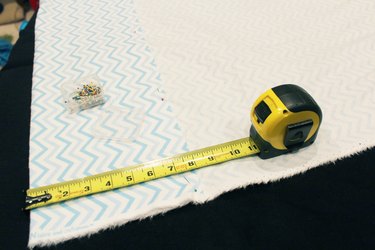
Cut the fabric into three separate pieces at 76 inches in length by 36 inches in width. The best method is to lay the fabric flat and measure the entire length at once for each piece. Be sure to make a straight cut.
Step 8: Sew the Seam
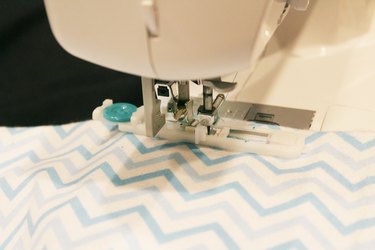
Once you cut your three panels of fabric, measure 8 inches from the top on the selvage side, fold the fabric over and pin, leaving a 1/4-inch seam allowance. This will be your seam for the top. Sew along the pin line, removing the pins as you sew. Do this for all three fabric panels.
Step 9: Sew the Buttonholes and Buttons
You will now place buttonholes on the top corners and mid-points of all three fabric panels. Measure 2 inches in from the sides and 1/2 inch down from the top for each corner button, and then measure 1/2 inch down from the top for the center button. Mark the measurements with a fabric marker.
Set your sewing machine to the buttonhole setting and sew a buttonhole on each marking. Use the seam ripper to open the buttonholes.
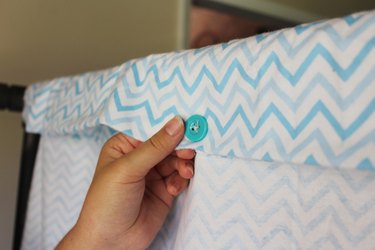
Fold the fabric over and line it up with the seam you sewed. Measure 2 inches up from the seam and sew the buttons along the flap so they line up with the buttonholes.
Step 10: Attach Fabric to the Divider
Drape the top of the fabric panels over the top of each section on the room divider and button them all along the top.