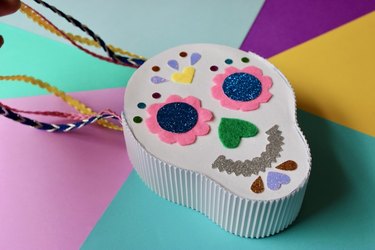
Sugar skulls, aka calaveras, are a meaningful hallmark of Día de los Muertos (Day of the Dead), representing the unique souls of dearly departed loved ones. These eye-catching skulls also serve as design inspiration for Day of the Dead celebrations. And that's where our sugar skull mini bags come into play! They're perfect for carrying candy or party favors. However you celebrate Día de los Muertos, these DIY mini bags are sure to add a pop of color to the festivities.
Ready to jump right in? Round up a few crafting supplies and immerse yourself in a time-honored tradition as you create a candy skull–inspired mini bag with this easy-to-follow tutorial.
Video of the Day
Video: Sugar Skull Mini Bags for Día de los Muertos
What Is Day of the Dead?
Día de los Muertos, or Day of the Dead, is a holiday tradition that originated in Mexico and is celebrated in many parts of the world. The holiday, which typically takes place on November 1 and November 2, encourages families to joyfully and colorfully celebrate the lives of deceased loved ones—a departure from more somber ceremonies typically associated with death. Families make vibrant sugar skulls, bake pan de muerto (sweet bread), create altars (or ofrendas), arrange colorful flowers and make offerings to those who have passed.
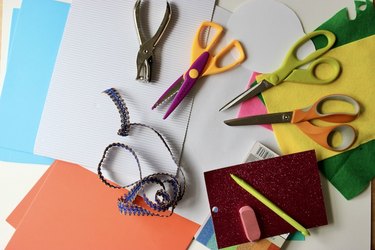
Things You'll Need
Paper for template
Pencil and eraser
Paper scissors
White glitter card stock
Foam sheet
Tacky glue
Felt sheets in three colors
Glitter card stock in several colors
Fabric scissors
Hole punch
Corrugated paper
Ribbons
Hot glue sticks
Hot glue gun
Zigzag-edge scissors (optional)
1. Create sugar skull template
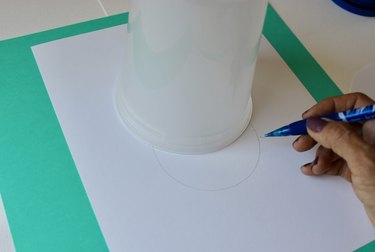
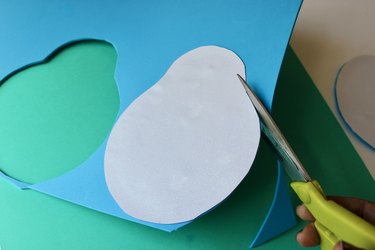
To create a sugar skull template, overlap two circular plastic containers in different sizes and create a skull shape on a sheet of paper. With pencil, trace the largest container first. A plastic yogurt container works well for this step.
Using a plastic cup, trace another (smaller) circle below first circle to create sugar skull jaw, erasing any lines inside circles. Your sugar skull should measure approximately 6 in. long and 4.5 in. wide. Cut along traced lines to make template.
2. Create front and back of bag
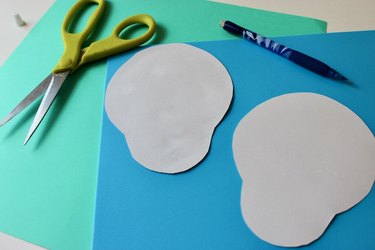
Use paper template to trace two sugar skulls out of white glitter card stock. Glue both sugar skulls onto a foam sheet using tacky glue. You can choose any foam color you wish for the interior of your sugar skull purse or bag.
Tip
Spread tacky glue using your fingers or a brush all over glitter card stock instead of leaving big blobs of glue. This will help avoid bubbles on paper and create a more uniform surface.
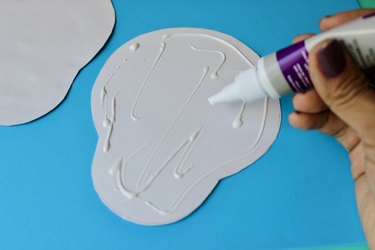
Finally, cut sugar skull shapes out of foam using adhered card stock as a guide.
3. Create sugar skull face
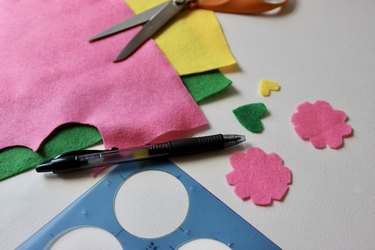
Use felt to make eyes, nose and a heart for the forehead. To make eyes, you'll need two felt flowers that are about 2 in. in diameter. For the nose, cut a 1 in.-wide heart. The forehead mini heart should measure about 1/2 in. wide.
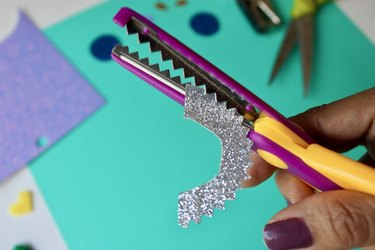
Use glitter card stock in different colors to fill out remainder of sugar skull face. To make interior of eyes, cut two circles measuring 1 in. each in diameter. To make mouth, cut a semicircle, then add zigzag edges to resemble teeth.
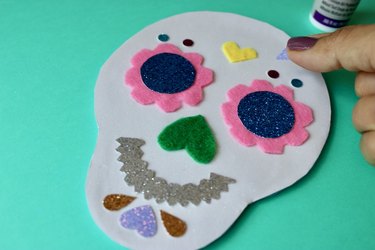
For decorative elements, cut another 1/2-in. heart, five cutouts that look like teardrops in varying colors and eight small circles in colors of your choice. We used a hole punch to create the smallest circles. Use tacky glue to adhere all elements to front of sugar skull mini bag and create a face.
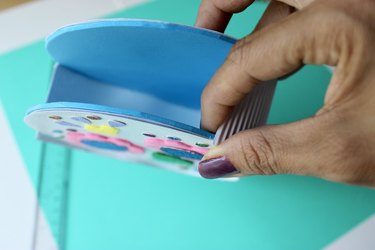
4. Construct mini bag

Cut a long strip of corrugated paper, approximately 11 in. long and 2 in. wide. Glue corrugated paper strip along sides of sugar skull faces using hot glue, leaving an opening at the top of the skulls, and press carefully.
Tip
For extra texture, glue shimmering rhinestones, scraps of faux leather or even a simple zipper closure to your sugar skull bag.
5. Create bag handle
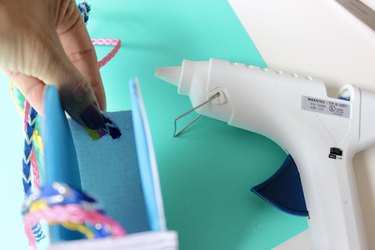
Use ribbons to create bag handle. Each ribbon should be approximately 16 in. long. Glue them carefully on the sides of mini bag using hot glue or tacky glue.
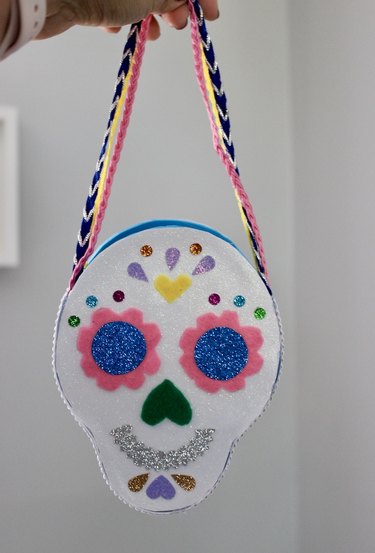
Make bag handles as short or long as you want, depending on preferred style. For example, use longer handles to create a crossbody bag or short handles to create party favors.

With that, you've created a beautiful and functional Day of the Dead mini bag. However you use it, we hope it reminds you to colorfully celebrate the lives of loved ones.